Only released in EOL distros:
Package Summary
simple_object_capture
- Author: Stuart Glaser
- License: BSD
- Source: hg https://kforge.ros.org/simplecap/simple_capture (branch: default)
Package Summary
simple_object_capture
- Author: Stuart Glaser
- License: BSD
- Source: hg https://kforge.ros.org/simplecap/simple_capture (branch: default)
Contents
Installation
Ubuntu
You can install the Kinect and capture stack from the Ubuntu packages:
sudo apt-get install ros-unstable-openni-kinect ros-unstable-simple-object-capture
Source
For an installation from source, create a rosinstall file called simple_object_capture.rosinstall:
- hg:
   local-name: simple_object_capture
   uri: <find uri on top of this page>
and run:
rosinstall <your_install_folder> <your_ros_folder> simple_object_capture.rosinstal
Data Capture
Mounting the Kinect
Put your Kinect on a raised surface, pointing down at about 45 degrees. The entire view of the Kinect should be a single horizontal surface (floor, table, ...). The objects you want to scan should be at least 0.5 meters away from the Kinect.


Data Capture
First, start up your Kinect.
roslaunch openni_launch openni.launch
Now, before you move on, make sure there is nothing in the view of the Kinect other than the floor plane. Once the capture pipeline starts up, it will try to detect this floor plane, so the Kinect needs a clear view of the floor plane. Now starts the capture pipeline, and specify the local folder where you want to results to get stored.
rosrun simple_object_capture capture /home/me/output_folder
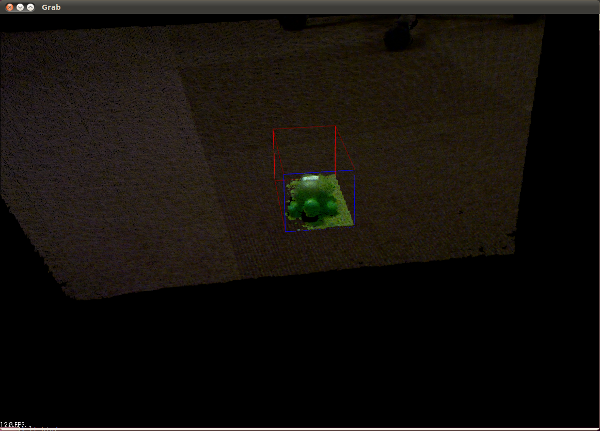
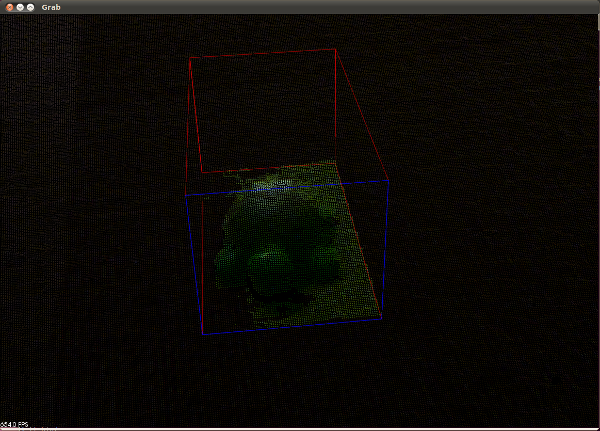
This brings up a viewer in which you can see the pointcloud of the Kinect, and a box that defines the scanning volume.
Configuration
All configuration is done through dynamic reconfigure:
rosrun dynamic_reconfigure reconfigure_gui
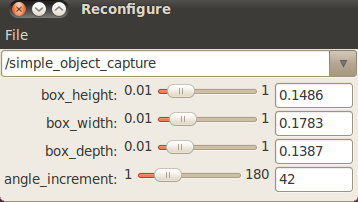
From the dropdown menu, select 'simple_object_capture'. You'll see the configuration options:

The first three sliders modify the size of the scanning box. When you move the sliders, you'll see the box change dimensions. Now change the size of the box, so the object you want to scan fits nicely inside the box. Ideally, the box is about 2x the size of the object you're scanning.
The last slider configures the angle_increment: every time you make a scan, the scanning box will rotate 'angle_increment' degrees. So if you want lots of scans of your object at small angle increments, decrease the angle_increment parameter. To get fewer scans, increase the angle_increment parameter. Note that to run registration algorithms, subsequent scans of your object will need enough overlap, so don't make the angle increment too large. 30 degrees is a typical setting.
Data Capture
Now position your object inside the scanning box, with the front of the object pointing towards the blue side of the box. When your object is positioned correctly, go to the viewer window, and press 'space bar' to trigger a scan. After the scan is complete, the box will rotate, and you can just repeat this process. The scanning will continue forever, until you press 'q' in the viewer window to stop scanning.


Registration
The output of the capture pipeline is stored in the output folder you specified when launching.
- snapshot*.pcd - Point Cloud files of the object with box-based priors.
- object_capture.bag - A bag file of topics needed for integration with the object recognition pipeline.
Now you can register the different views of the object together, using the new point-to-plane ICP in pcl. Run:
rosrun simple_object_capture register_object path_to/object_capture.bag output_folder
This will automatically register all the views together, and write the result in the "output_folder".
Output
The registered pointcloud is written in the RoboEarth format, in "output_foler/output_folder.zip". You can upload this file to the RoboEarth database.
A number of debug images that give insight into the ICP registration is written to output_foler_debug.
Uploading to RoboEarth
RoboEarth comes with a handy command line tool to upload your new model to its database. The tool is called upload_object_model and lives in the re_object_recorder package.
You can use it like this:
rosrun re_object_recorder upload_object_model --key <API-KEY> you_model.zip
Report a Bug
<<TracLink(REPO COMPONENT)>>


