Quickstart: Create and deploy ARM templates by using the Azure portal
In this quickstart, you learn how to create an Azure Resource Manager template (ARM template) in the Azure portal. You edit and deploy the template from the portal.
ARM templates are JSON or Bicep files that define the resources you need to deploy for your solution. To understand the concepts associated with deploying and managing your Azure solutions, see template deployment overview.
After completing the tutorial, you deploy an Azure Storage account. You can use the same process to deploy other Azure resources.
If you don't have an Azure subscription, create a free account before you begin.
Retrieve a custom template
Instead of manually building an entire ARM template, you can retrieve a prebuilt template that accomplishes your goal. The Azure Quickstart Templates repo contains a large collection of templates that deploy common scenarios. The portal makes it easy for you to find and use templates from this repo. You can save the template and reuse it later.
In a web browser, go to the Azure portal and sign in.
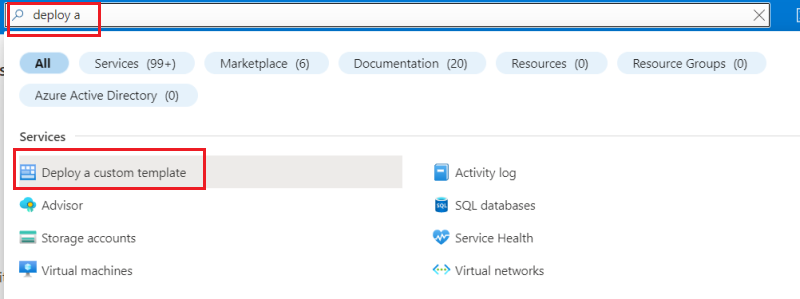
From the Azure portal search bar, search for deploy a custom template and then select it from the available options.
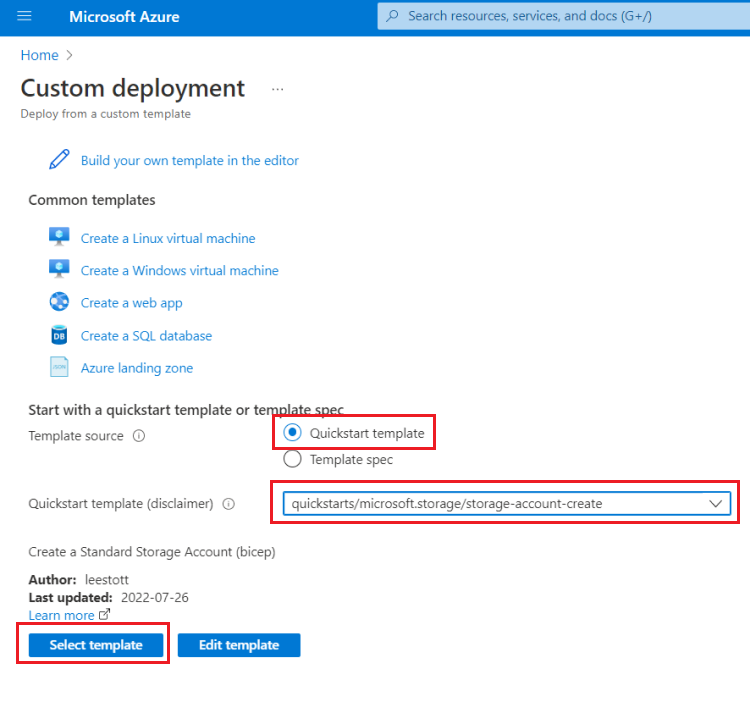
For Template source, notice that Quickstart template is selected by default. You can keep this selection. In the drop-down, search for quickstarts/microsoft.storage/storage-account-create and select it. After finding the quickstart template, select Select template.
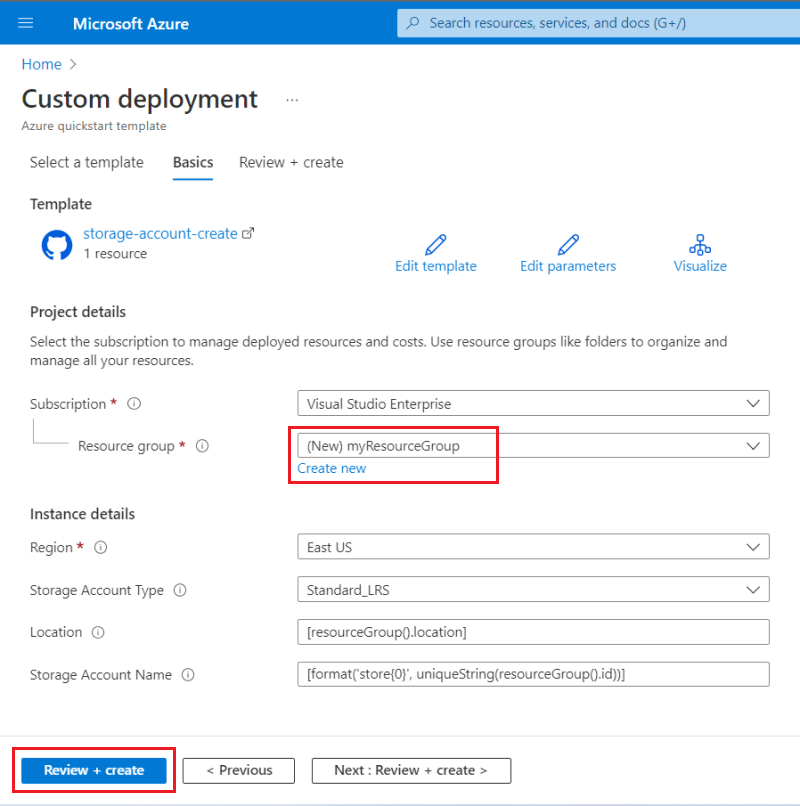
Provide custom values to use for the deployment.
For Resource group, select Create new and provide myResourceGroup for the name. You can use the default values for the other fields. When you finish providing values, select Review + create.
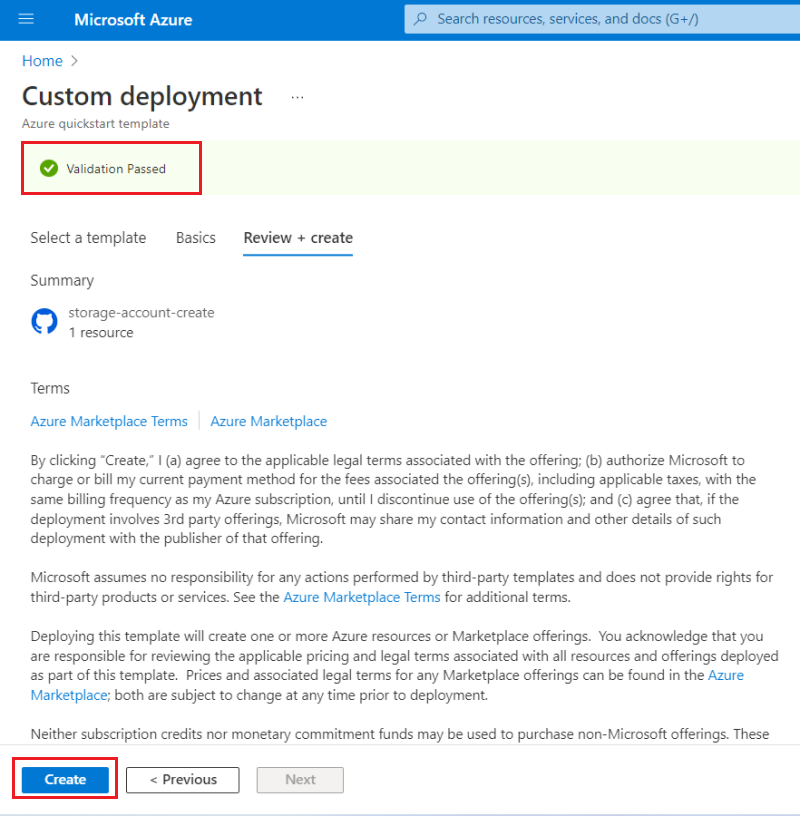
The portal validates your template and the values you provided. After validation succeeds, select Create to start the deployment.
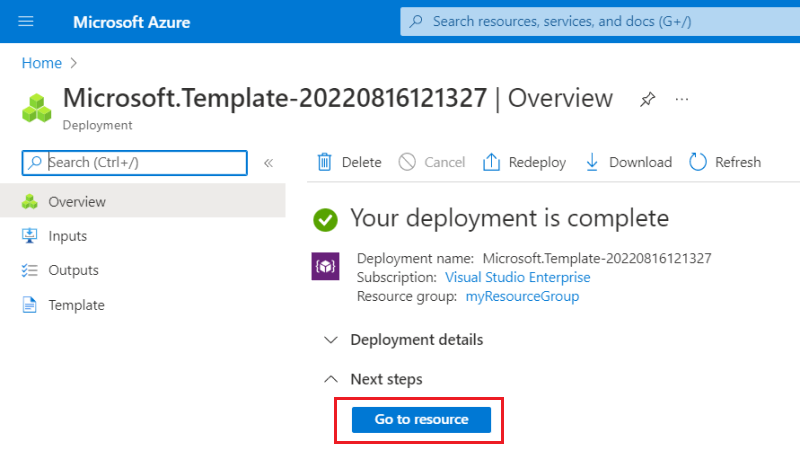
Once your validation passes, you see the status of the deployment. When it completes successfully, select Go to resource to see the storage account.
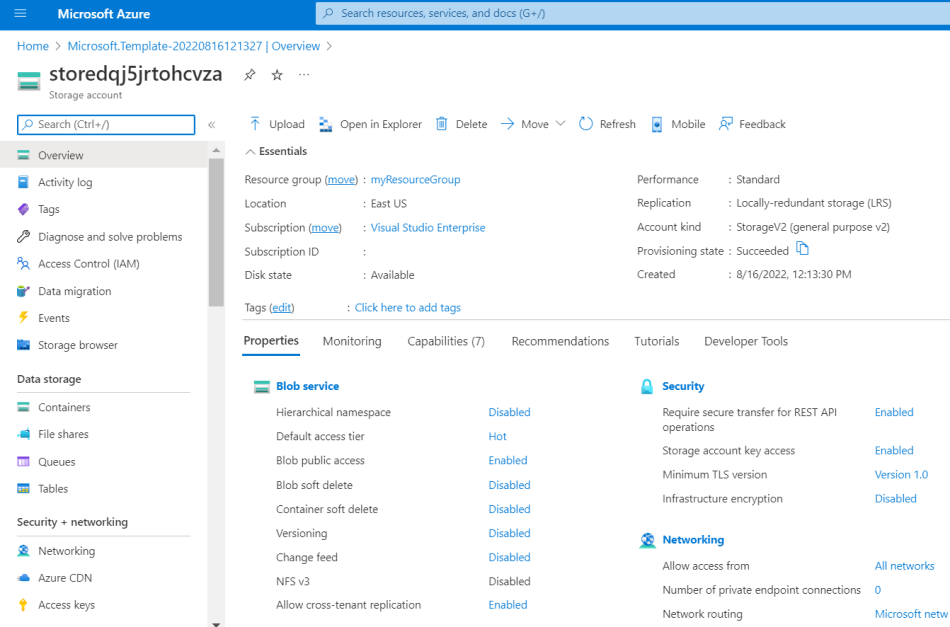
From this screen, you can view the new storage account and its properties.
Edit and deploy the template
You can use the portal for quickly developing and deploying ARM templates. In general, we recommend using Visual Studio Code for developing your ARM templates, and Azure CLI or Azure PowerShell for deploying the template. However, you can use the portal for quick deployments without installing those tools.
In this section, suppose you have an ARM template that you want to deploy one time without setting up the other tools.
Again, select Deploy a custom template in the portal.
This time, select Build your own template in the editor.
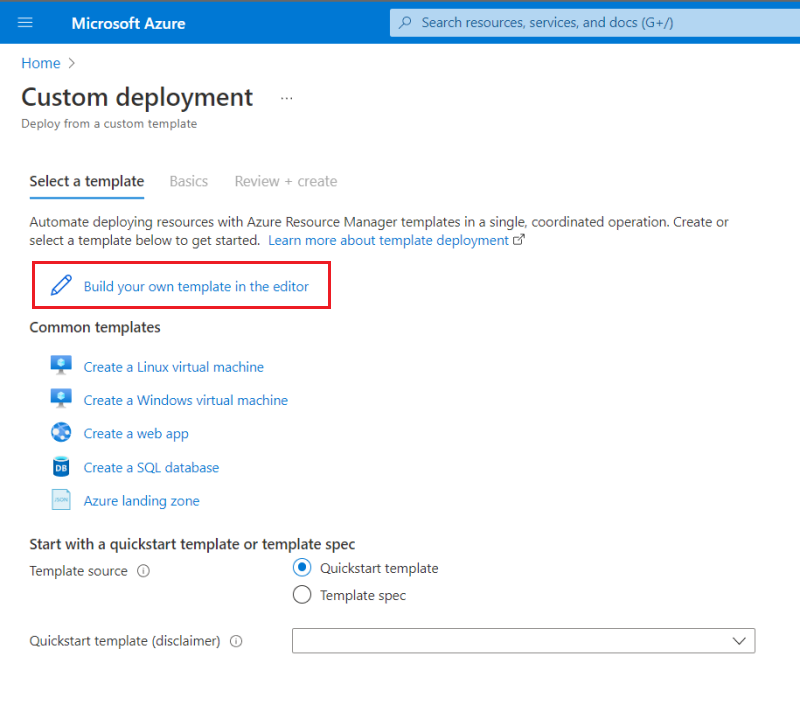
You see a blank template.

Replace the blank template with the following template. It deploys a virtual network with a subnet.
{
  "$schema": "https://schema.management.azure.com/schemas/2019-04-01/deploymentTemplate.json#",
  "contentVersion": "1.0.0.0",
  "parameters": {
    "vnetName": {
      "type": "string",
      "defaultValue": "VNet1",
      "metadata": {
        "description": "VNet name"
      }
    },
    "vnetAddressPrefix": {
      "type": "string",
      "defaultValue": "10.0.0.0/16",
      "metadata": {
        "description": "Address prefix"
      }
    },
    "subnetPrefix": {
      "type": "string",
      "defaultValue": "10.0.0.0/24",
      "metadata": {
        "description": "Subnet Prefix"
      }
    },
    "subnetName": {
      "type": "string",
      "defaultValue": "Subnet1",
      "metadata": {
        "description": "Subnet Name"
      }
    },
    "location": {
      "type": "string",
      "defaultValue": "[resourceGroup().location]",
      "metadata": {
        "description": "Location for all resources."
      }
    }
  },
  "resources": [
    {
      "type": "Microsoft.Network/virtualNetworks",
      "apiVersion": "2021-08-01",
      "name": "[parameters('vnetName')]",
      "location": "[parameters('location')]",
      "properties": {
        "addressSpace": {
          "addressPrefixes": [
            "[parameters('vnetAddressPrefix')]"
          ]
        },
        "subnets": [
          {
            "name": "[parameters('subnetName')]",
            "properties": {
              "addressPrefix": "[parameters('subnetPrefix')]"
            }
          }
        ]
      }
    }
  ]
}
Select Save.
You see the pane for providing deployment values. Again, select myResourceGroup for the resource group. You can use the other default values. When you're done providing values, select Review + create.
After the portal validates the template, select Create.
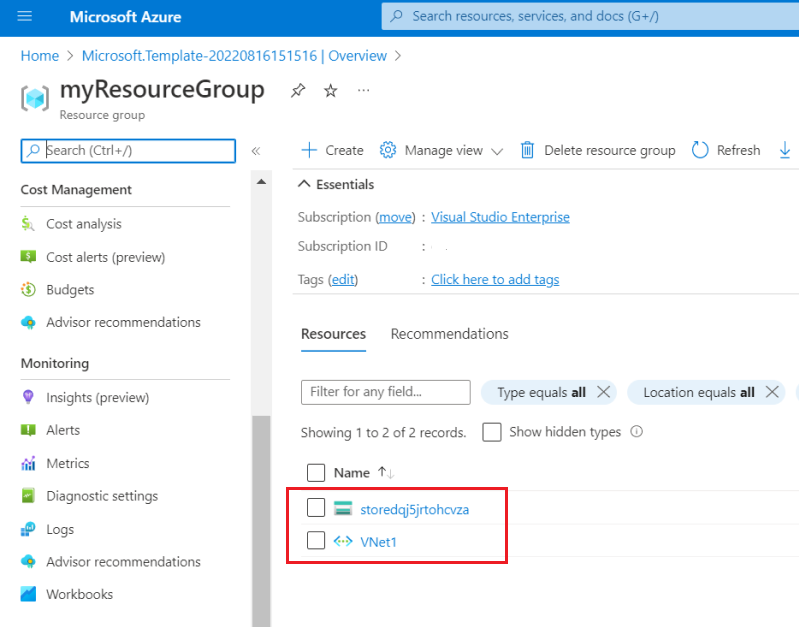
When the deployment completes, you see the status of the deployment. This time, select the name of the resource group.
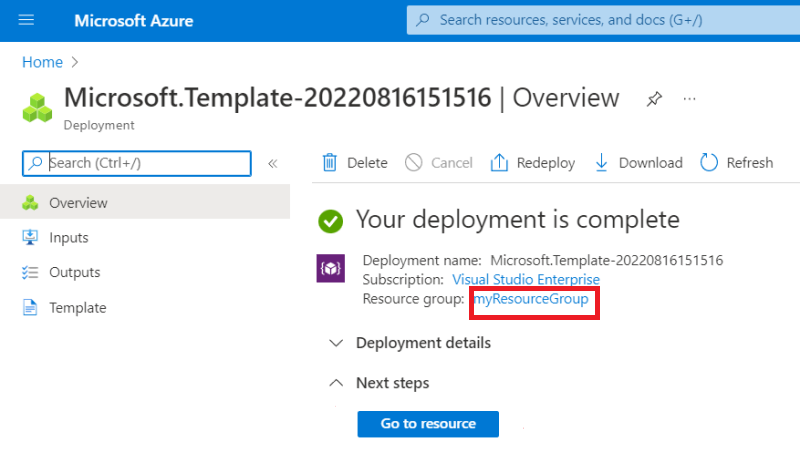
Your resource group now contains a storage account and a virtual network.
Export a custom template
Sometimes, the easiest way to work with an ARM template is to have the portal generate it for you. The portal can create an ARM template based on the current state of your resource group.
In your resource group, select Export template.
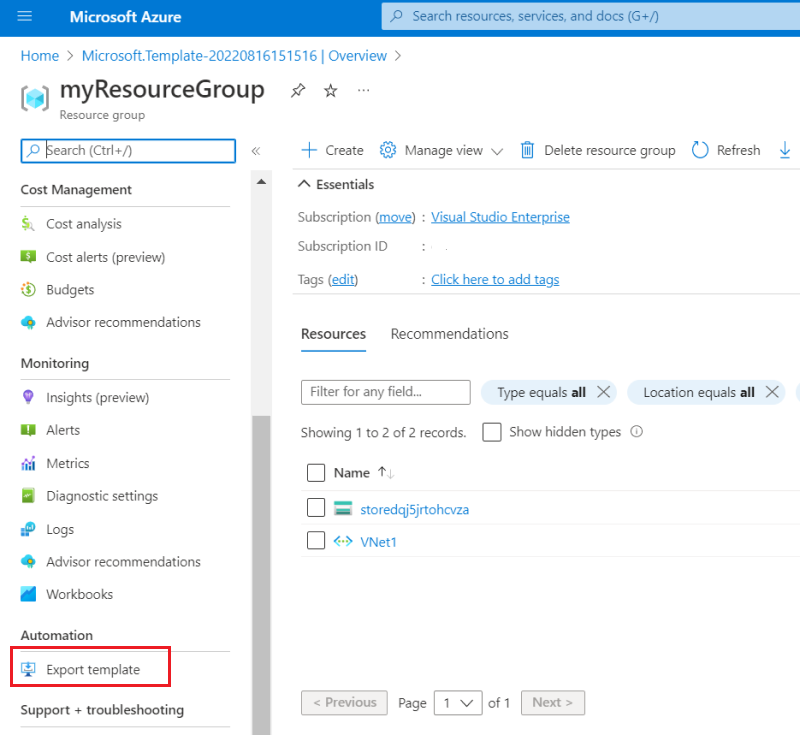
The portal generates a template for you based on the current state of the resource group. This template isn't the same as either template you deployed earlier. It contains definitions for both the storage account and virtual network, along with other resources like a blob service that was automatically created for your storage account.
To save this template for later use, select Download.
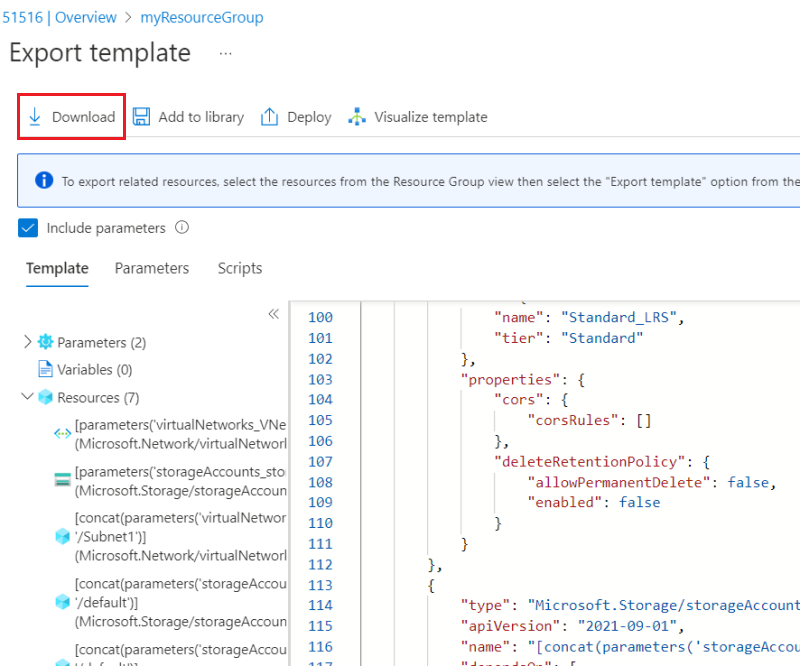
You now have an ARM template that represents the current state of the resource group. This template is autogenerated. Before using the template for production deployments, consider revising it, such as by adding parameters for template reuse.
Clean up resources
When you no longer need the Azure resources, clean up the resources you deployed by deleting the resource group.
- In the Azure portal, select Resource groups on the left menu.
- Enter the resource group name in the Filter for any field search box.
- Select the resource group name. You see the storage account in the resource group.
- Select Delete resource group in the top menu.
Next steps
In this tutorial, you learned how to generate a template from the Azure portal, and how to deploy the template using the portal. The template used in this Quickstart is a simple template with one Azure resource. When the template is complex, it's easier to use Visual Studio Code, or Visual Studio to develop the template. To learn more about template development, see our new beginner tutorial series: