About forwarded ports
Port forwarding gives you access to TCP ports running within your codespace. For example, if you're running a web application on a particular port in your codespace, you can forward that port. This allows you to access the application from the browser on your local machine for testing and debugging.
When an application running inside a codespace prints output to the terminal that contains a localhost URL, such as http://localhost:PORT or http://127.0.0.1:PORT, the port is automatically forwarded. If you're using GitHub Codespaces in the browser or in Visual Studio Code, the URL string in the terminal is converted into a link that you can click to view the web page on your local machine. By default, GitHub Codespaces forwards ports using HTTP.
You can edit the dev container configuration for the repository to automatically forward one or more ports. You can also forward a port manually, label forwarded ports, share forwarded ports with members of your organization, share forwarded ports publicly, and add forwarded ports to the codespace configuration.
Note
Organization owners can restrict the ability to make forward ports available publicly or within the organization. For more information, see Restricting the visibility of forwarded ports.
Forwarding a port
You can manually forward a port that wasn't forwarded automatically.
-
Open the terminal in your codespace.
-
Click the PORTS tab.
-
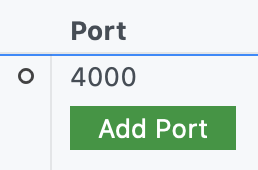
Under the list of ports, click Add port.
-
Type the port number or address, then press Enter.

Using HTTPS forwarding
By default, GitHub Codespaces forwards ports using HTTP but you can update any port to use HTTPS, as needed. If you update a port with public visibility to use HTTPS, the port's visibility will automatically change to private.
-
Open the terminal in your codespace.
-
Click the PORTS tab.
-
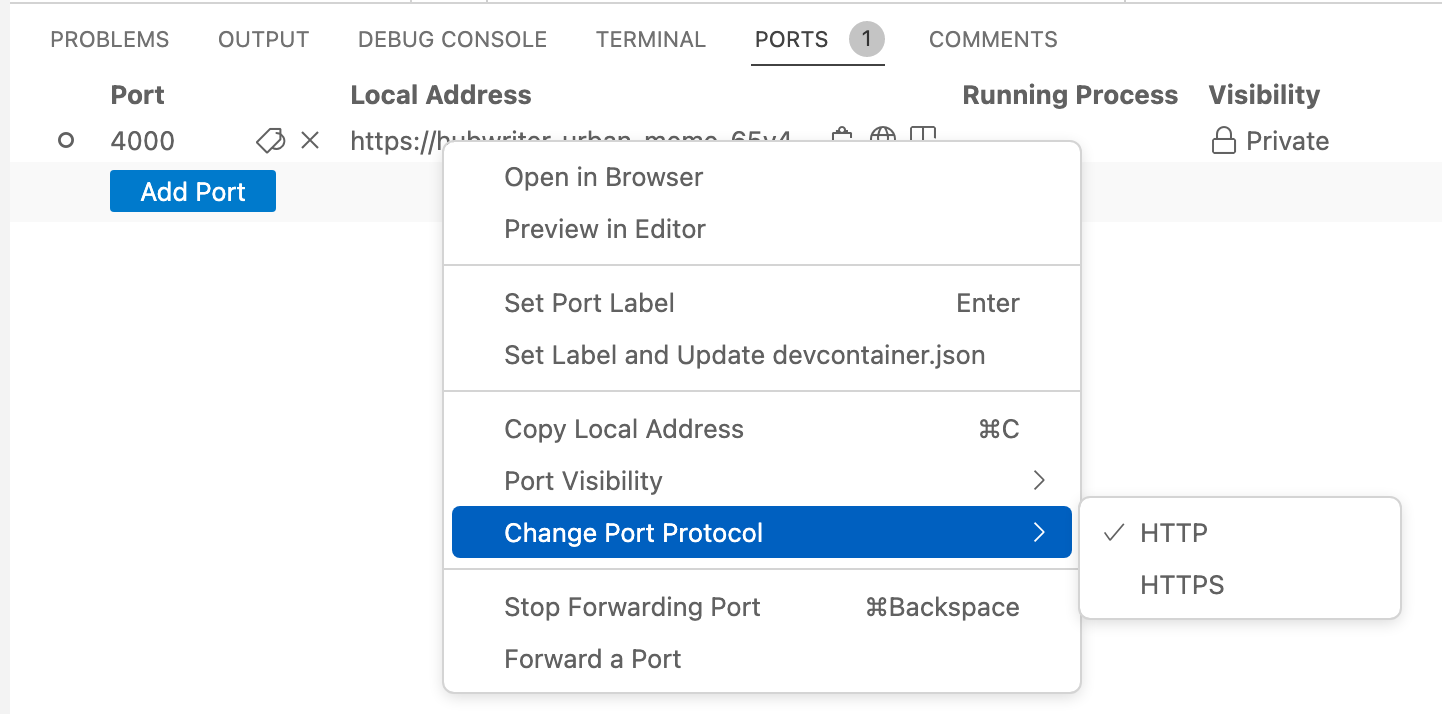
Right-click the port you want to update, then hover over Change Port Protocol.
-
Select the protocol needed for this port. The protocol that you select will be remembered for this port for the lifetime of the codespace.
Sharing a port
Note
You can only make a port private to an organization if your organization uses GitHub Team or GitHub Enterprise Cloud.
If you want to share a forwarded port with others, you can either make the port private to your organization or make the port public. After you make a port private to your organization, anyone in the organization with the port's URL can view the running application. After you make a port public, anyone who knows the URL and port number can view the running application without needing to authenticate.
Note
Your choice of port visibility options may be limited by a policy configured for your organization. For more information, see Restricting the visibility of forwarded ports.
-
Open the terminal in your codespace.
-
Click the PORTS tab.
-
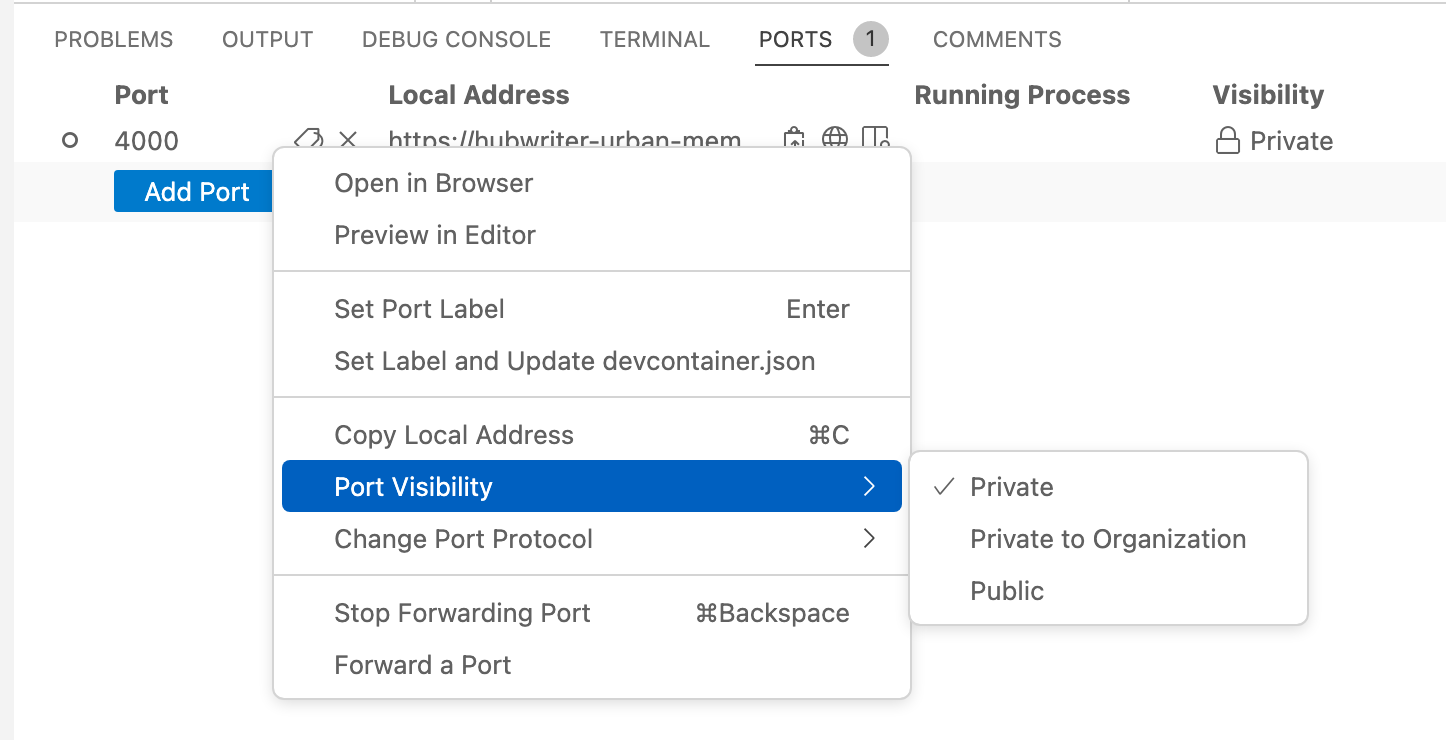
Right-click the port that you want to share, click the Port Visibility, then click Private to Organization or Public.
-
To the right of the local address for the port, click the copy icon.

-
Send the copied URL to the person you want to share the port with.
Using command-line tools and REST clients to access ports
When you forward a port, your application becomes available at the URL https://CODESPACENAME-PORT.app.github.dev. For example, https://monalisa-hot-potato-vrpqrxxrx7x2rxx-4000.app.github.dev. If you forward a private port from the VS Code desktop application, your application will also be available at a localhost port such as 127.0.0.1:4000.
To access your application using a REST client, such as Postman, or a command-line tool like curl, you don't need to authenticate if you're using a localhost port, or if you're accessing a public port at the remote domain. However, to connect to a private port at the remote domain, you must authenticate by using the GITHUB_TOKEN access token in your request.
Note
The GITHUB_TOKEN is automatically created when you start a codespace and remains the same for the duration of the codespace session. If you stop and then restart a codespace a new GITHUB_TOKEN is generated.
Finding the address to connect to
-
Open the terminal in your codespace.
-
Click the PORTS tab. This lists all of the ports you have forwarded.
-
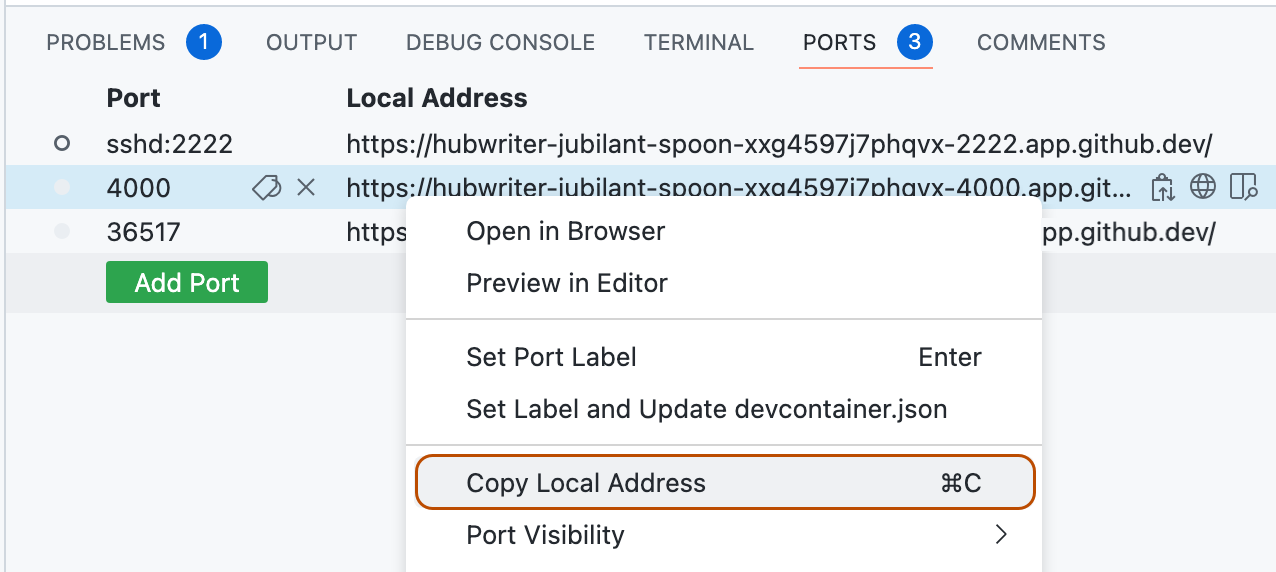
Right-click the port you want to connect to and click Copy Local Address.
-
Paste the copied address somewhere for later use.
Finding the GITHUB_TOKEN
-
In the terminal in your codespace, enter
echo $GITHUB_TOKEN.The token is a string beginning
ghu_. -
Copy the token.
Important
Don't share this access token with anyone.
Using curl to access a forwarded port
In a terminal on your local computer, enter:
curl ADDRESS -H "X-Github-Token: TOKEN"
Replace ADDRESS and TOKEN with the values you copied previously.
Using Postman to access a forwarded port
-
Open Postman.
-
Create a new GET request.
-
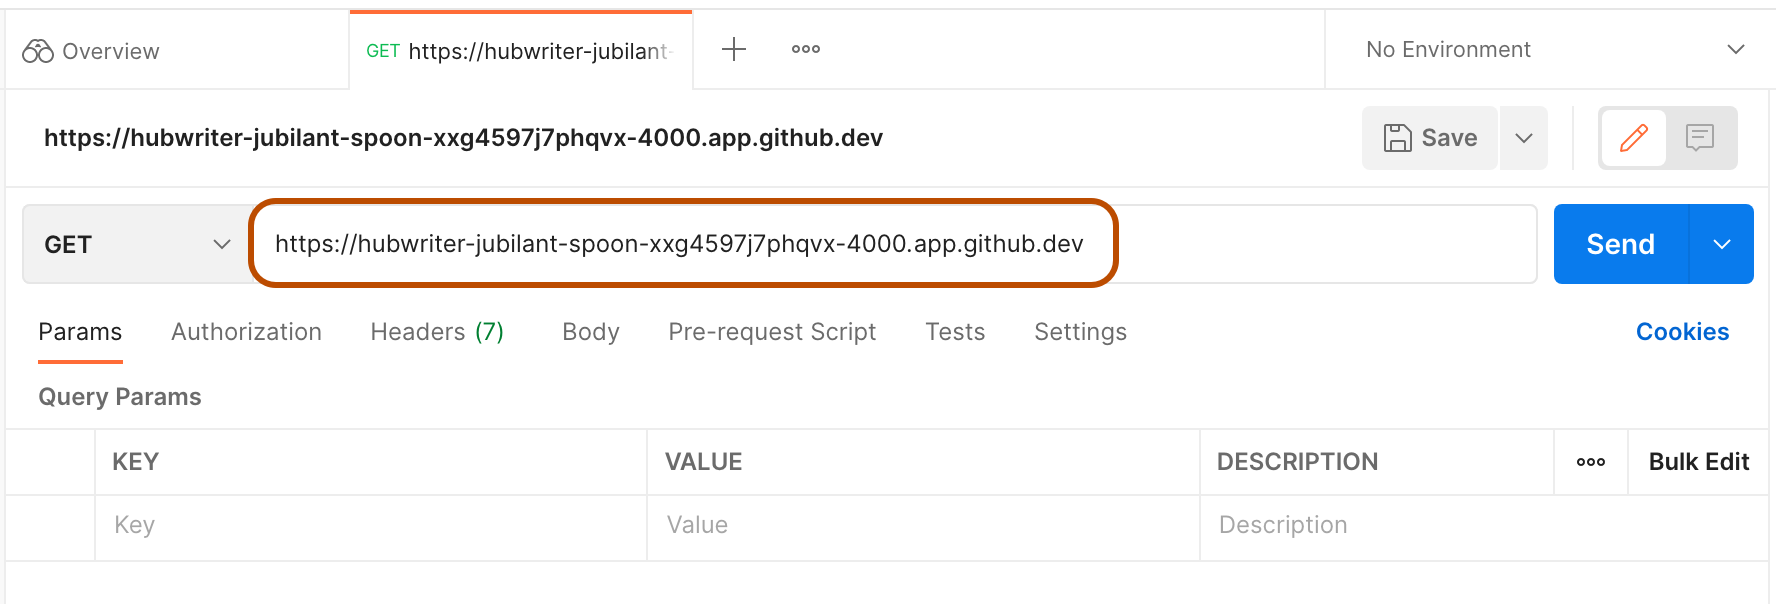
Paste the address you copied previously as the request URL.
-
In the Headers tab, create a new entry where the key is "X-Github-Token" and the value is the
GITHUB_TOKENyou copied previously.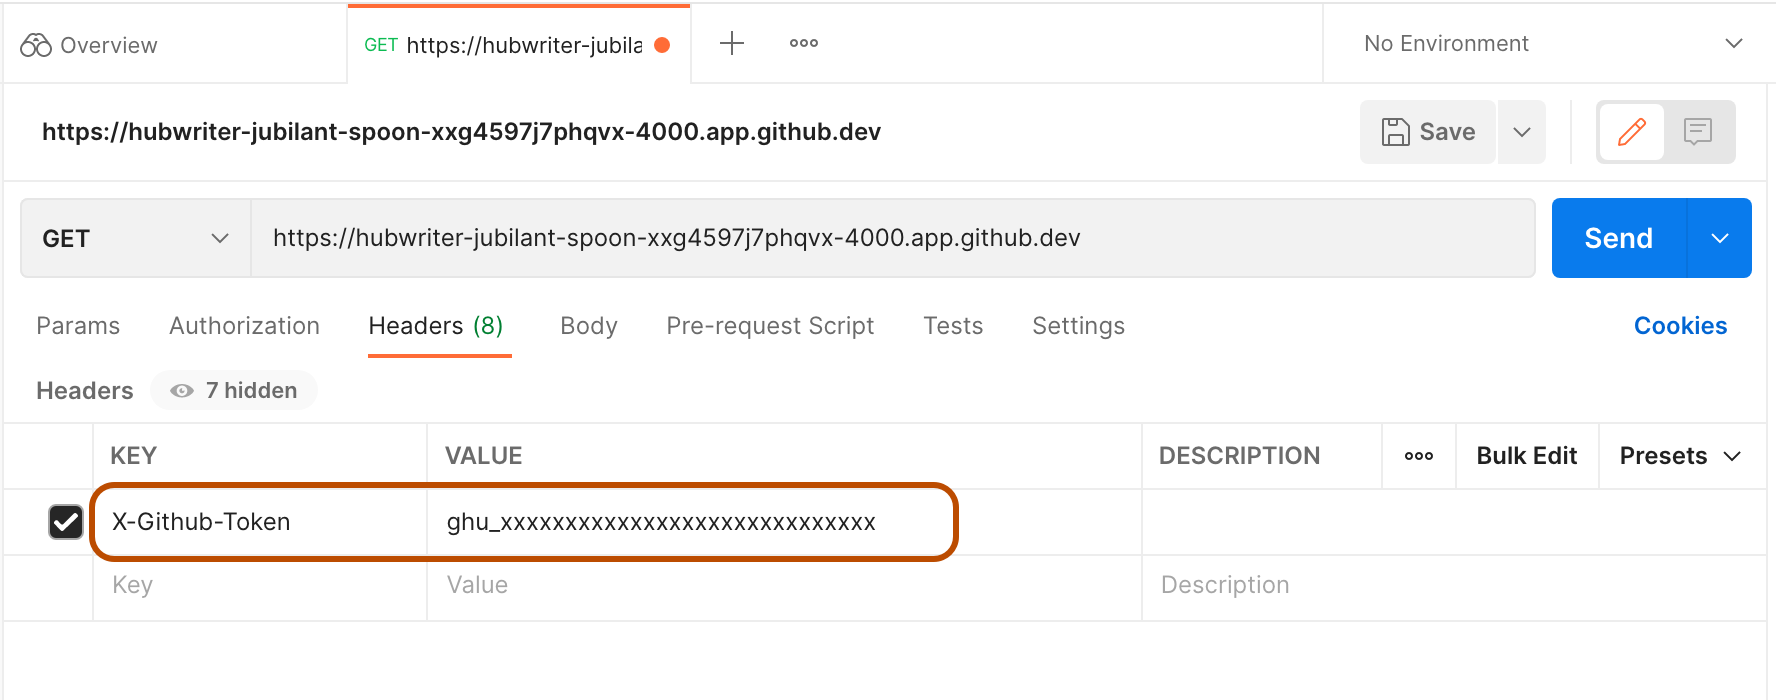
-
Click Send.
Automatically forwarding a port
You can add a forwarded port to the GitHub Codespaces configuration for the repository, so that the port will be automatically forwarded for all codespaces created from the repository. After you update the configuration, any previously created codespaces must be rebuilt for the change to apply. For more information about the dev container configuration file, see Introduction to dev containers.
-
In your codespace, open the dev container configuration file you want to update. Typically this file is
.devcontainer/devcontainer.json. -
Add the
forwardPortsproperty."forwardPorts": [NUMBER],Replace
NUMBERwith the port number you want to forward. This can be a comma-separated list of port numbers. -
Save the file.
Labeling a port
When you open a codespace in the browser, or in the VS Code desktop application, you can label a forwarded port to make it easier to identify in a list.
-
Open the terminal in your codespace.
-
Click the PORTS tab.
-
Right-click the port you want to label, then click Set Port Label.

-
Type a label for your port, then press Enter.

Automatically labeling a forwarded port
You can label a port and write the change to a dev container configuration file for the repository. If you do this for a port that is automatically forwarded, using the forwardPorts property, then the label will be automatically applied to that forwarded port for all future codespaces created from the repository using that configuration file.
-
Open the terminal in your codespace.
-
Click the PORTS tab.
-
Right-click the port whose label attribute you want to add to the codespace configuration, then click Set Label and Update devcontainer.json.

-
Type a label for your port, then press Enter.

-
If your repository has more than one dev container configuration file, you will be prompted to choose which file you want to update.
The dev container configuration file is updated to include the new label in the
portsAttributesproperty. For example:// Use 'forwardPorts' to make a list of ports inside the container available locally. "forwardPorts": [3333, 4444], "portsAttributes": { "3333": { "label": "app-standard-preview" }, "4444": { "label": "app-pro-preview" } }
When an application running inside a codespace prints output to the terminal that contains a localhost URL, such as http://localhost:PORT or http://127.0.0.1:PORT, the port is automatically forwarded. If you're using GitHub Codespaces in the browser or in Visual Studio Code, the URL string in the terminal is converted into a link that you can click to view the web page on your local machine. By default, GitHub Codespaces forwards ports using HTTP.
You can edit the dev container configuration for the repository to automatically forward one or more ports. You can also forward a port manually, label forwarded ports, share forwarded ports with members of your organization, share forwarded ports publicly, and add forwarded ports to the codespace configuration.
Note
Organization owners can restrict the ability to make forward ports available publicly or within the organization. For more information, see Restricting the visibility of forwarded ports.
Forwarding a port
You can manually forward a port that wasn't forwarded automatically.
-
Open the terminal in your codespace.
-
Click the PORTS tab.
-
Under the list of ports, click Add port.

-
Type the port number or address, then press Enter.

Sharing a port
Note
You can only make a port private to an organization if your organization uses GitHub Team or GitHub Enterprise Cloud.
If you want to share a forwarded port with others, you can either make the port private to your organization or make the port public. After you make a port private to your organization, anyone in the organization with the port's URL can view the running application. After you make a port public, anyone who knows the URL and port number can view the running application without needing to authenticate.
Note
Your choice of port visibility options may be limited by a policy configured for your organization. For more information, see Restricting the visibility of forwarded ports.
-
Open the terminal in your codespace.
-
Click the PORTS tab.
-
Right-click the port that you want to share, click Port Visibility, then click Private to Organization or Public.

-
To the right of the local address for the port, click the copy icon.

-
Send the copied URL to the person you want to share the port with.
Using command-line tools and REST clients to access ports
When you forward a port, your application becomes available at the URL https://CODESPACENAME-PORT.app.github.dev. For example, https://monalisa-hot-potato-vrpqrxxrx7x2rxx-4000.app.github.dev. If you forward a private port from the VS Code desktop application, your application will also be available at a localhost port such as 127.0.0.1:4000.
To access your application using a REST client, such as Postman, or a command-line tool like curl, you don't need to authenticate if you're using a localhost port, or if you're accessing a public port at the remote domain. However, to connect to a private port at the remote domain, you must authenticate by using the GITHUB_TOKEN access token in your request.
Note
The GITHUB_TOKEN is automatically created when you start a codespace and remains the same for the duration of the codespace session. If you stop and then restart a codespace a new GITHUB_TOKEN is generated.
Finding the address to connect to
-
Open the terminal in your codespace.
-
Click the PORTS tab. This lists all of the ports you have forwarded.
-
Right-click the port you want to connect to and click Copy Local Address.

-
Paste the copied address somewhere for later use.
Finding the GITHUB_TOKEN
-
In the terminal in your codespace, enter
echo $GITHUB_TOKEN.The token is a string beginning
ghu_. -
Copy the token.
Important
Don't share this access token with anyone.
Using curl to access a forwarded port
In a terminal on your local computer, enter:
curl ADDRESS -H "X-Github-Token: TOKEN"
Replace ADDRESS and TOKEN with the values you copied previously.
Using Postman to access a forwarded port
-
Open Postman.
-
Create a new GET request.
-
Paste the address you copied previously as the request URL.

-
In the Headers tab, create a new entry where the key is "X-Github-Token" and the value is the
GITHUB_TOKENyou copied previously.
-
Click Send.
Automatically forwarding a port
You can add a forwarded port to the GitHub Codespaces configuration for the repository, so that the port will be automatically forwarded for all codespaces created from the repository. After you update the configuration, any previously created codespaces must be rebuilt for the change to apply. For more information about the dev container configuration file, see Introduction to dev containers.
-
In your codespace, open the dev container configuration file you want to update. Typically this file is
.devcontainer/devcontainer.json. -
Add the
forwardPortsproperty."forwardPorts": [NUMBER],Replace
NUMBERwith the port number you want to forward. This can be a comma-separated list of port numbers. -
Save the file.
Labeling a port
When you open a codespace in the browser, or in the VS Code desktop application, you can label a forwarded port to make it easier to identify in a list.
-
Open the terminal in your codespace.
-
Click the PORTS tab.
-
Right-click the port you want to label, then click Set Port Label.

-
Type a label for your port, then press Enter.

Automatically labeling a forwarded port
You can label a port and write the change to a dev container configuration file for the repository. If you do this for a port that is automatically forwarded, using the forwardPorts property, then the label will be automatically applied to that forwarded port for all future codespaces created from the repository using that configuration file.
-
Open the terminal in your codespace.
-
Click the PORTS tab.
-
Right-click the port whose label attribute you want to add to the codespace configuration, then click Set Label and Update devcontainer.json.

-
Type a label for your port, then press Enter.

-
If your repository has more than one dev container configuration file, you will be prompted to choose which file you want to update.
The dev container configuration file is updated to include the new label in the
portsAttributesproperty. For example:// Use 'forwardPorts' to make a list of ports inside the container available locally. "forwardPorts": [3333, 4444], "portsAttributes": { "3333": { "label": "app-standard-preview" }, "4444": { "label": "app-pro-preview" } }
Note
To learn more about GitHub CLI, see About GitHub CLI.
To forward a port use the gh codespace ports forward subcommand. Replace codespace-port:local-port with the remote and local ports that you want to connect. After entering the command choose from the list of codespaces that's displayed.
gh codespace ports forward CODESPACE-PORT:LOCAL-PORT
For more information about this command, see the GitHub CLI manual.
To see details of forwarded ports enter gh codespace ports and then choose a codespace.
Sharing a port
Note
You can only make a port private to an organization if your organization uses GitHub Team or GitHub Enterprise Cloud.
If you want to share a forwarded port with others, you can either make the port private to your organization or make the port public. After you make a port private to your organization, anyone in the organization with the port's URL can view the running application. After you make a port public, anyone who knows the URL and port number can view the running application without needing to authenticate.
Note
Your choice of port visibility options may be limited by a policy configured for your organization. For more information, see Restricting the visibility of forwarded ports.
To change the visibility of a forwarded port, use the gh codespace ports visibility subcommand. There are three visibility settings:
private- Visible only to you. This is the default setting when you forward a port.org- Visible to members of the organization that owns the repository.public- Visible to anyone who knows the URL and port number.
Replace codespace-port with the forwarded port number. Replace setting with private, org, or public. After entering the command choose from the list of codespaces that's displayed.
gh codespace ports visibility CODESPACE-PORT:SETTINGS
You can set the visibility for multiple ports with one command. For example:
gh codespace ports visibility 80:private 3000:public 3306:org
For more information about this command, see the GitHub CLI manual.
Using command-line tools and REST clients to access ports
When you forward a port, your application becomes available at the URL https://CODESPACENAME-PORT.app.github.dev. For example, https://monalisa-hot-potato-vrpqrxxrx7x2rxx-4000.app.github.dev. If you forward a private port from the VS Code desktop application, your application will also be available at a localhost port such as 127.0.0.1:4000.
To access your application using a REST client, such as Postman, or a command-line tool like curl, you don't need to authenticate if you're using a localhost port, or if you're accessing a public port at the remote domain. However, to connect to a private port at the remote domain, you must authenticate by using the GITHUB_TOKEN access token in your request.
Note
The GITHUB_TOKEN is automatically created when you start a codespace and remains the same for the duration of the codespace session. If you stop and then restart a codespace a new GITHUB_TOKEN is generated.
Finding the address to connect to
To find the address for a forwarded port, enter gh codespace ports. If you have more than one codespace, select the appropriate codespace from the list that's displayed.
Copy the address and paste it somewhere for later use.
Finding the GITHUB_TOKEN
-
Start an SSH session for your codespace.
gh codespace ssh -
If you have more than one codespace, select the appropriate codespace from the list that's displayed.
-
Display the
GITHUB_TOKEN.echo $GITHUB_TOKENThe token is a string beginning
ghu_. -
Copy the token.
Important
Don't share this access token with anyone.
-
Exit the SSH session.
exit
Using curl to access a forwarded port
In a terminal on your local computer, enter:
curl ADDRESS -H "X-Github-Token: TOKEN"
Replace ADDRESS and TOKEN with the values you copied previously.
Using Postman to access a forwarded port
-
Open Postman.
-
Create a new GET request.
-
Paste the address you copied previously as the request URL.

-
In the Headers tab, create a new entry where the key is "X-Github-Token" and the value is the
GITHUB_TOKENyou copied previously.
-
Click Send.
Automatically forwarding a port
You can add a forwarded port to the GitHub Codespaces configuration for the repository, so that the port will be automatically forwarded for all codespaces created from the repository. After you update the configuration, any previously created codespaces must be rebuilt for the change to apply. For more information about the dev container configuration file, see Introduction to dev containers.
-
In your codespace, open the dev container configuration file you want to update. Typically this file is
.devcontainer/devcontainer.json. -
Add the
forwardPortsproperty."forwardPorts": [NUMBER],Replace
NUMBERwith the port number you want to forward. This can be a comma-separated list of port numbers. -
Save the file.
Labeling a port
When you open a codespace in the browser, or in the VS Code desktop application, you can label a forwarded port to make it easier to identify in a list.
-
Open the terminal in your codespace.
-
Click the PORTS tab.
-
Right-click the port you want to label, then click Set Port Label.

-
Type a label for your port, then press Enter.

Automatically labeling a forwarded port
You can label a port and write the change to a dev container configuration file for the repository. If you do this for a port that is automatically forwarded, using the forwardPorts property, then the label will be automatically applied to that forwarded port for all future codespaces created from the repository using that configuration file.
-
Open the terminal in your codespace.
-
Click the PORTS tab.
-
Right-click the port whose label attribute you want to add to the codespace configuration, then click Set Label and Update devcontainer.json.

-
Type a label for your port, then press Enter.

-
If your repository has more than one dev container configuration file, you will be prompted to choose which file you want to update.
The dev container configuration file is updated to include the new label in the
portsAttributesproperty. For example:// Use 'forwardPorts' to make a list of ports inside the container available locally. "forwardPorts": [3333, 4444], "portsAttributes": { "3333": { "label": "app-standard-preview" }, "4444": { "label": "app-pro-preview" } }
Seeing port labels on the command line
You can see the port labels when you list the forwarded ports for a codespace. To do this, use the gh codespace ports command and then select a codespace.