- About the Arduino library Talkie
- Hardware
- Tools required for converting wav-files to LPC data
- Audacity installation
- Python language installation
- python_wizzard installation
- Git clone code repository
- Voice recording with Audacity
- Export the recording as a wav-file
- Analyze your recording
- Convert Wav file to LPC hex data
- Install Arduino library Talkie
- FAQ
- References
In the beginning, it was Talkie by Peter Knight, a software implementation of the Texas Instruments speech synthesis architecture (Linear Predictive Coding) from the late 1970s to early 1980s. This library was later refined and improved over the years, and the refurbished Talkie is now maintained by Armin Joachimsmeyer.
Microcontrollers generally lack storage space for vast amounts of voice data. LPC is a widely used method in speech coding and speech synthesis. It is a powerful speech analysis technique and a valuable way for encoding (good-quality speech!) at a low bit rate resulting in a small size.
YT Gadget Reboot and his episode Arduino Speech Synthesizer: Talkie Library LPC Speech Generator is an excellent introduction to the speech subject. Add speech to the robotic device or other voice applications where slightly weird mechanical speech is wanted.
You only need an ESP32, an audio amplifier, and a small speaker element to start. The Talkie library has predefined 1200+ different sounds, words, and phrases ready to be used.
You can add new words or phrases by converting recorded wav-files and then encoding them to LPC data to be used in the ESP32 code. Purchase the Arduino Talkie Speech Amplifier shield for ESP32 TinyPICO at Tindie.
- Microphone, any decent microphone, or a webcam microphone. My Logitech Logi C922 worked fine.
- Audacity audio software. It Works for Windows, Linux, and macOS.
- The command line LPC analysis tool python_wizard generates bitstreams for the Texas Instruments TMS5220 chip. It Works for Windows, Linux, and macOS.
An alternative to python_wizzard is BlueWizzard for macOS users. We will not cover it here, but Gadget Reboot used it successfully.
- MediaInfo to test the
wav-filefor compatibility with LPC encoding.
- Sample wav file 128kbs (8KHz, 16bit) - hello.waw
- Resulting LCS data - hellolpc.h
Windows 10+ and macOS
Follow the information on their Download page. The plugin FFmpeg for Windows is required.
Linux/Debian/Ubuntu
Install via the package manager
sudo apt install audacity
Windows 10+
python_wizzard is a CLI application that runs under Windows Linux Subsystem (WSL2).
- Follow Microsoft's procedure to set up WSL2.
Once WSL2 is up and running, install Python v3, assuming the Linux distro is Debian or Ubuntu. The latter is MS default.
sudo apt install python3
Linux/Debian/Ubuntu
Most likely, Python v3 is already installed. Test with:
~$ python3 --version
    Python 3.9.2
macOS
I have no access to macOS. Thus, it's left TBD until someone is kind and makes a PR. Python v3 is likely already installed.
Windows 10+
The remaining Windows instructions (in the WSL2 environment) follow the Linux/Debian/Ubuntu procedure.
Linux/Debian/Ubuntu
Install the remaining prerequisites for python_wizzard. First, install git and the SciPy, python3-tk libraries.
sudo apt install git python3-scipy python3-tk
macOS
I have no access to macOS. Thus, it's left TBD until someone is kind and makes a PR.
Browse to GitHub and the python_wizzard repository and copy the clone link under the green Code button.
Use git to clone a copy of the repository to a local directory.
git clone https://github.com/ptwz/python_wizard.git
Important to note that the resulting wav-file must be:
- Mono
- 8KHz sampling rate
- 16-bit encoded
- Constant bit rate
We will later verify all critical wav-file characteristics with MediaInfo.
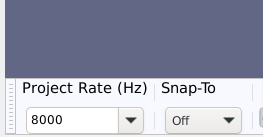
In the left lower corner at Project Rate (Hz), set it to 8000
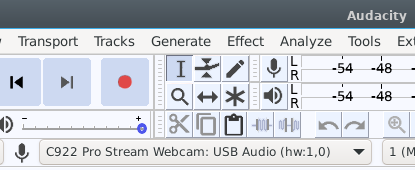
Select the attached microphone in the drop-down list
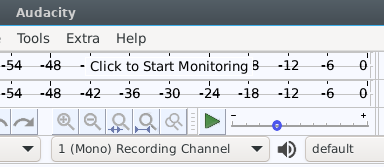
Select Mono in the drop-down menu for the recording
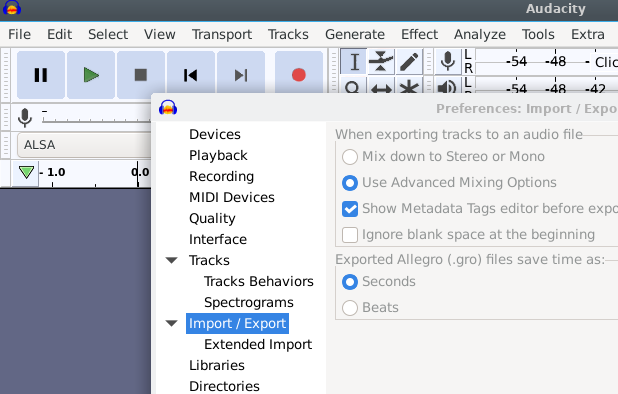
Use menu Edit -> Preferences ...
In Preferences:Export/Import, select Use Advance Mixing Options
In Preferences:Quality, select Default Sample Format 16-bit and check that Default Sample Rate is 8000 Hz
A single soundtrack is displayed
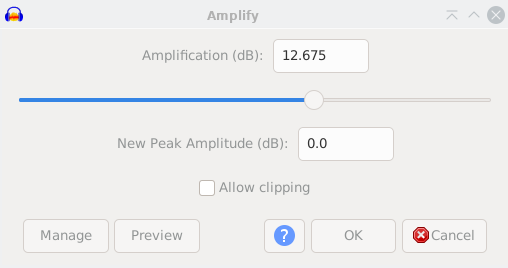
Select the soundtrack with Ctrl-A and menu Effect -> Amplify ...`, accept the proposed gain-value, and press OK
Adjusted sound level by accepting default gain
Export the recording with the menu File -> Export -> Wav.
One or two more dialogs may appear after this but continue with OK.
Save your named file; here, we use test.wav as an example.
Verify that the audio wav-file meets the requirements by uploading it to MediaInfo.
Here is a good sample result.
General
Complete name                            : test.wav
Format                                   : Wave
File size                                : 85.5 KiB
Duration                                 : 5 s 468 ms
Overall bit rate mode                    : Constant
Overall bit rate                         : 128 kb/s

Audio
Format                                   : PCM
Format settings                          : Little / Signed
Codec ID                                 : 1
Duration                                 : 5 s 468 ms
Bit rate mode                            : Constant
Bit rate                                 : 128 kb/s
Channel(s)                               : 1 channel
Sampling rate                            : 8 000 Hz
Bit depth                                : 16 bits
Stream size                              : 85.4 KiB (100%)
Check that your file has the following characteristics.
- Overall bit rate mode = Constant
- Overall bit rate = 128 kB/s
- Format = PCM
- Format settings = Little / Signed
- Channel(s) = 1 channel
- Sampling rate = 8 000 Hz
- Bit depth = 16 bits
There is no idea to continue until your wav-file has this correct.
Note: On Windows 10+, a practical challenge is to move the wav-file into the WSL2 environment.
I'm not a frequent Windows 10 user; thus, I rely on someone with experience who can suggest a solution (PR) to this issue.
Change to the downloaded python_wizard directory.
Copy the wav-file to this directory and run the command line application:
python3 python_wizard -S -T tms5220 -f arduino test.wav
or output its output to a file directly:
python3 python_wizard -S -T tms5220 -f arduino test.wav > testlpc.h
Then include the header file testlpc.h in the Arduino main sketch. See the directory arduino/hello directory for an example.
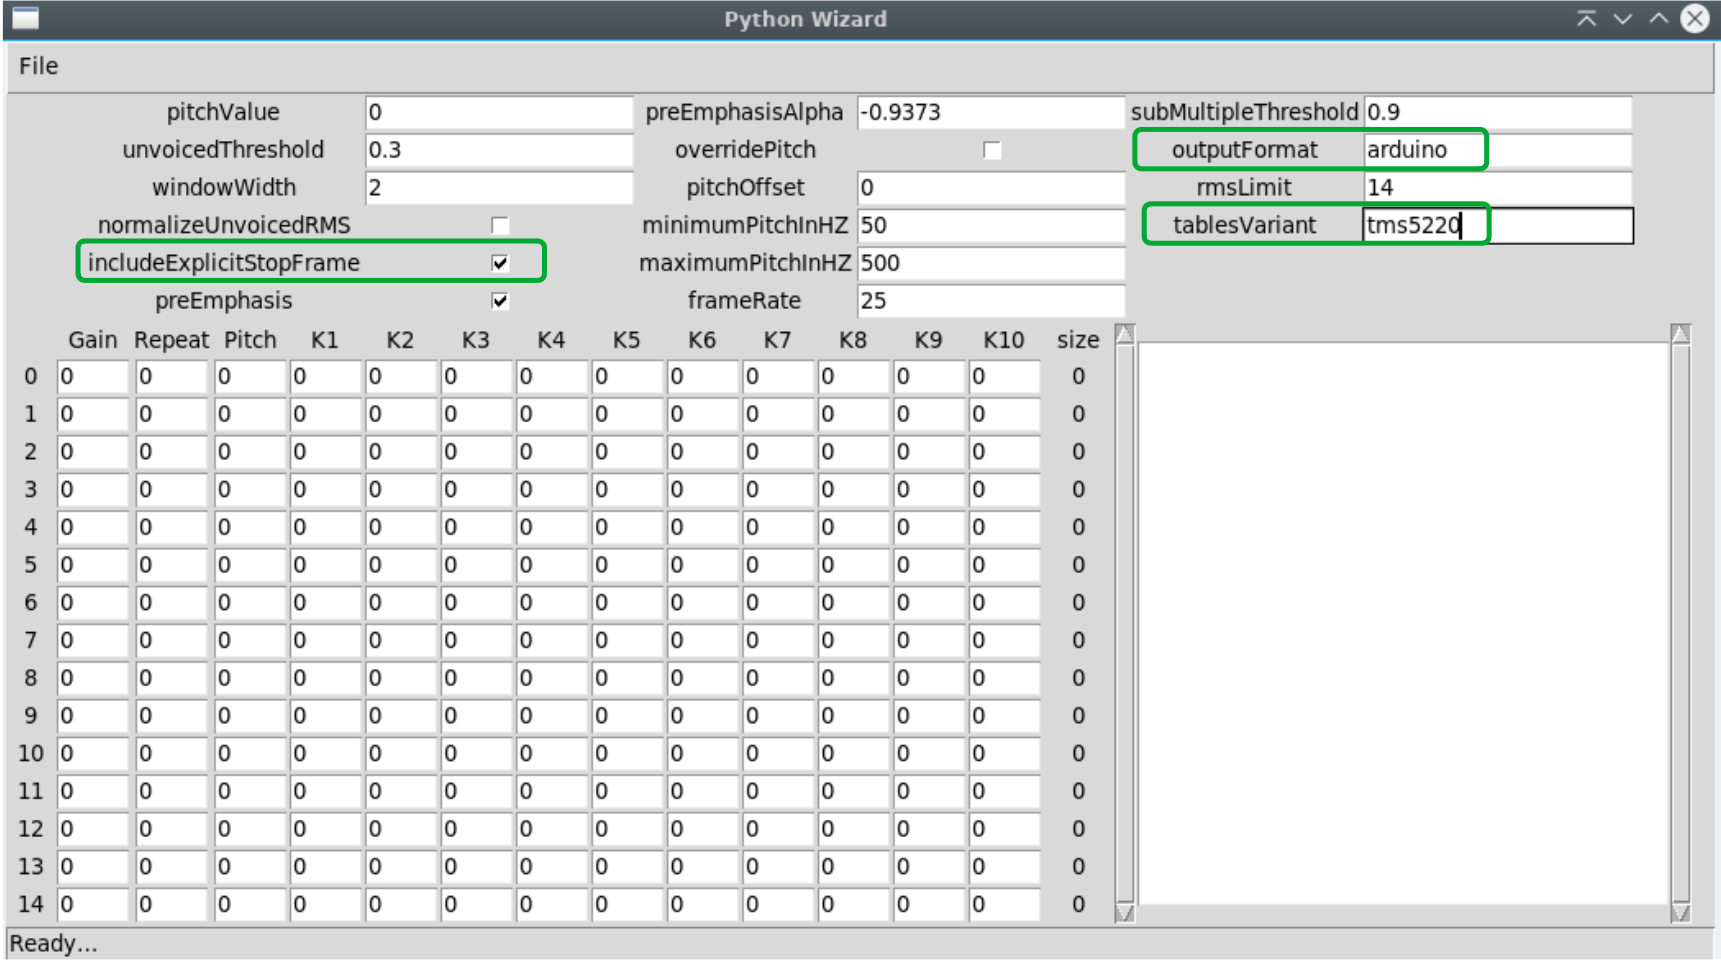
Start the application by typing at the terminal:
python3 python_wizzard_gui
Ensure that includeExplicitStopFrame is marked, outputFormat is arduino, and tableVariant is tms5220.
However, it may work, or the application may fail with no code showing up in the output windows to the right.
The terminal shows NameError: name 'CodingTable' is not defined or some other error messages from an unresolved bug in the GUI application.
I can not recommend its usage, but it is included here for completeness.
Browse to Arduino IDE download page to install Arduino IDE.
Please, see the Arduino library installation documentation and how to install the Arduino library Talkie.
Q: My overall bit rate is 256 kB/s. What should I do?
A: The wave file is not mono; thus, 2 x 8000 x 16 is 256 kB/s. Export the file as a mono (1 ch) file in Audacity. An alternative is to upload the wav-file to Oline-convert and only select the dropdown for Change audio channels and select Mono.
Q: I tried the python_wizzard_gui, but nothing happens when I load my wav-file; what to do?
A: Run the CLI instead with the parameters explained above.
Q: What cause the python_wizzard_gui error NameError: name 'CodingTable' is not defined?
A: A common cause is that the wav-file is not compliant as described above, or simply an unresolved bug in the application cause this error. Use the CLI application to resolve the issue.
Q: What Arduino-compatible boards do I need to try this practically?
A: A standard Arduino UNO board will do as a starter. These are available on Amazon. However, I would recommend an ESP32 with significantly more memory and WiFi capability for a real DIY project. Next, boost the audio output with the Arduino Talkie Speech Amplifier. The shield sits on top of the UM ESP32 TinyPICO. Finally, add a small speaker to begin your new robotic project.
Q: My recording sounds full of clicks and pops when I play it with the Talkie library on my Arduino Uno board; why does the robotic voice sound like that?
A: Remember that synthesizing human voices is quite challenging. The vocal tract (the throat and mouth) forms the tube, characterized by its resonances; these resonances give rise to formants or enhanced frequency bands in the sound produced. Hisses and pops are generated by the tongue, lips, and throat action during sibilants and plosives. Human sounds dominantly produced in the mouth are complex and lacking resonances. For example, consider how the letter x in the word hex sounds. Compare this with the vocal sounds represented by vowels that are open and without friction.
Q: What can I do to improve my recorded words and phrases?
A: Analyze the recording already in Audacity, and decide if to use a synonymous word which may result in less noisy spikes. In articulatory phonetics, a consonant is a speech sound articulated with a complete or partial closure of the vocal tract. These are harder to LPC encode satisfactorily. Many tools are available in Audacity to mitigate the negative effect on sound quality.
An example of a recorded voice sample with click/pop noise at the end.

