YOFO is a script for Magic Lantern that allows you to use your lens' internal focusing motor to achieve precise and repeatable focus at infinity.
The short idea is: you move your lens to hard stop beyond infinity, count how many steps it takes your focusing motor to get to infinity and save this value. After that, when you are in the field, you can achieve perfect focus in just a few simple steps:
- Move your lens to infinity
- Turn on AF
- Goto to YOFO menu and activate pre-set position
- Turn off AF
- ?
- Profit!
At the moment this procedure assumes that the focusing point does not depend on the temperature, which should be tested, but probably true for most lens, except telephoto ones.
Dependencies: This script requires the latest experimental version of Magic Lantern (2020-12-28 18:15), which you can find here.
Note that this is for Canon cameras. I only tested this on my Canon 6D.
This software is provided as-is without any guaranties.
I am absolutely not responsible for any damage caused by Magic Lantern or this script.
Magic Lantern is not officially supported by Canon and in principle can damage or even brick your camera.
Check if your camera is compatible with Magic Lantern first.
Be sure you know what you are doing before proceeding!
- First install Magic Lantern (ML). Refer to instructions elsewhere to find out how.
- Open ML/scripts folder on your SD or CF card and copy YOFO.lua script there.
- Load the card into the camera, go to Scripts menu of ML and activate the script by setting Autorun to ON.
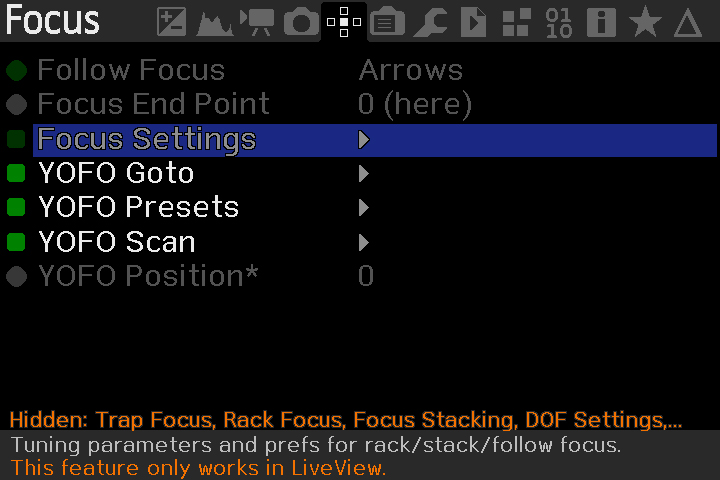
- Restart your camera. The Focus menu should have YOFO items added:
Note that in the menu above I hid some of the menu items that I don't need, you will see more menu items.
First, it is a good idea to set up Focus Settings in ML:
- Follow focus should be set on Follow Focus. This will allow you to tweak your focuser position in the live mode by hitting left and right buttons on your camera's wheel (the one around Set button on the right of the screen in case of 6D). As you tweak the focus, the Focus End Point with show how many steps you went left or right using these buttons. This will help you to determine the focus point for your presets.
- Here are my settings for Focus Settings Items:
- The most important setting is the Step Size, which should ideally be set to 1 (smallest step). If for some reason Step Size of 1 does not work for you, you can leave 2 or 3, but be sure to change _STEP_SIZE constant in the YOFO.lua script to have the same value.
Now, the YOFO menu.
-
YOFO Goto. This is the menu that will allow you to activate presets. For now the script has two presets: RGB and Ha. They will have the values that you will set in YOFO Presets menu. IMPORTANT NOTE: Always move your focusing ring to the hard stop beyond infinity before activating presets.
-
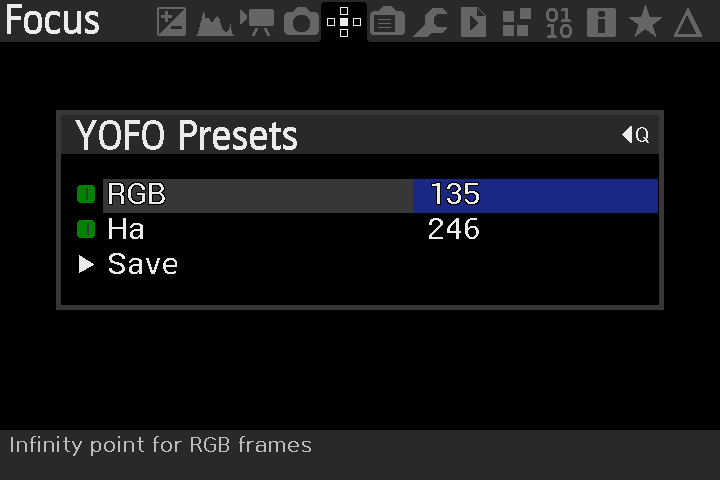
YOFO Presets. This is the menu that will allow you to save the focusing points that you have found either manually (using Follow Focus I described above) or using YOFO Scan I will describe below. If you open this menu, you will have options to change preset values and then save then into the memory card to persist. If you won't save the values, they will only live until you restart the camera. Note: these presets will be saved and loaded for each individual lens, so every time you put a new lens you be able to create new presets. And, of course, when you will put on a lens that have presets, they will be loaded back. This way you can have presets for all the lens you have and they will be loaded automatically every time you switch. Here is how this menu looks like:
- YOFO Scan. This menu allows you to find the best focus point to put into YOFO presets. The way this works is super easy: you put your lens to hard stop beyond infinity, activate AF and run the scan. The scan settings include starting point, end point and step size. After you hit Run, the camera will move through a number of positions you have specified and take pictures at each and every one of them. You will only need to look through the images and select the one with the best focus. Here is how this menu looks like:
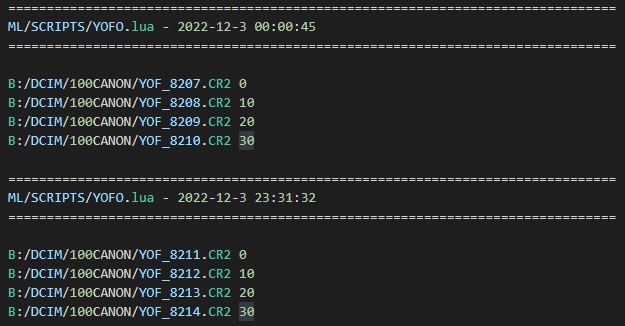
As a nice bonus, the YOFO Scan will save logs into ML/scripts/yofo_scans/scan_logs.lua file with information about images taken and corresponding focuser positions:
So you can analyze these images later in the comfort of your home.
Happy focusing! If you find this script useful, I would highly appreciate you to mentioning it, for example in your software list on Astrobin.


