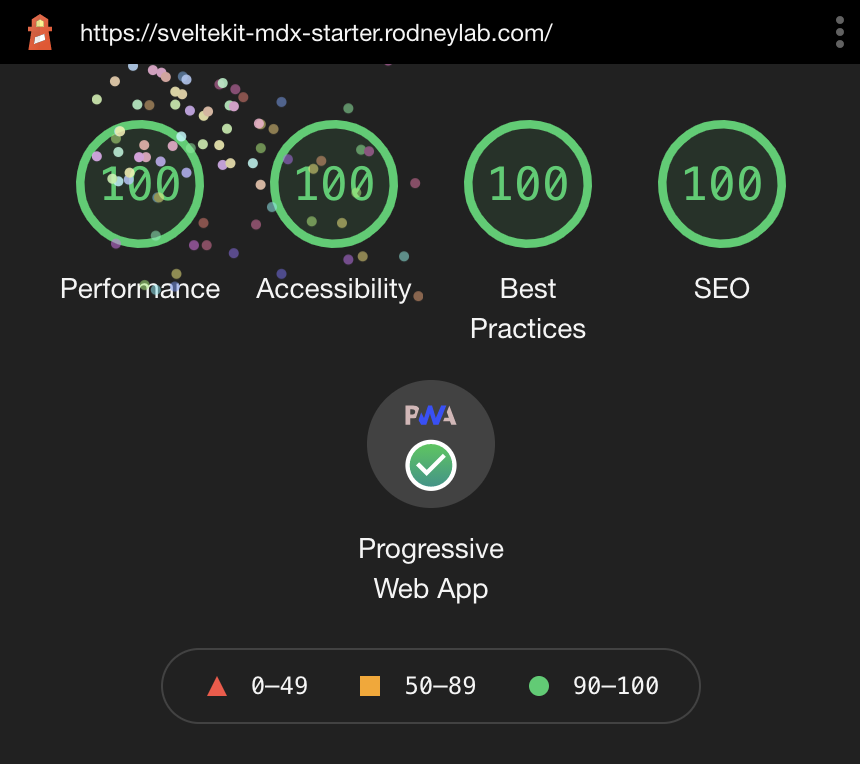
SvelteKit blog starter to help you get going on your next Svelte blog site. The project creates a Progressive Web App (PWA) out of the box. You just need to customise with your logos etc.
See the Sveltekit Blog Starter blog post on the Rodney Lab site for some explanation of what's inside and how to customise. Please drop questions into a comment at the bottom of that page.
Here's the quick start:
Everything you need to build a Svelte blog site, powered by sveltekit-blog-mdx.
If you're seeing this, you've probably already done this step. Congrats!
git clone https://github.com/rodneylab/sveltekit-blog-mdx.git my-new-mdsvex-blog
cd my-new-mdsvex-blog
pnpm install # or npm install
npm run devThe starter creates and caches responsive images using the vite-imagetools plugin. This is straightforward to use when you know ahead of time which image you want to include. You just import it on the page you want to use it on:
import featuredImageSrc from '$lib/assets/home/home.jpg';The vite-imagetools plugin will then generate and hash the image. See examples in src/routes/index.svelte.
The example where you want to have a different featured image for each blog post is a little more complicated, though manageable. In this case, you can run a script (see generate-responsive-image-data.js) to iterate though all blog posts, taking the featured image from the blog post front matter. This script can then output the necessary imports into a generated JavaScript file, one for each blog post (see src/lib/generated directory). Finally you can dynamically import that JavaScript file in the blog template load function.
To run the included script at the command like type:
pnpm run gen:imagesThis should be done each time you add new blog posts. It also generates a low resolution placeholder, to minimise Content Layout shift during page load.
For the script to find your blog post images, add them under the src/lib/assets/blog folder. In that folder, create a new folder whose name matches the post slug and add the images to the new folder. The name of the file needs to match the name you use is the post frontmatter (for featuredImage, for example).
The script may need some tweaking for your use case. Let me know how it can be improved.
- The XML sitemap gets generated in the server route
src/routes/sitemap.xml/+server.js. Tweak this file to adjust output.
Make sure your site's URL is defined in .env as the PUBLIC_SITE_URL variable so the correct URLs are output to the site map.
The starter mostly generates PWA config automatically, including service worker for offline availability and adding meta to the HTML head section. A PWA needs a manifest file detailing logos (for favicons) in different sizes, compatible with various devices. You will need to generate a set of icons in assets/:
- apple-touch-icon.png
- favicon.ico
- icon.svg
- icon-192.png
- icon-512.png
You can use free open source tools to generate and optimise these from an input SVG. That resource includes a shell script you can run to automate generation.
The HTML meta for PWAs is added in the component at src/lib/components/PWA.svelte.
You can customise the manifest (including icon file path) by editing src/lib/config/website.js. The following variables feed into the generated manifest.json file:
siteTitle,siteShortTitle,siteUrl,backgroundColor,themeColor.
See article on Progressive Web Apps in SvelteKit for more.
npm run buildYou can preview the built app with
npm run preview, regardless of whether you installed an adapter. This should not be used to serve your app in production.
.
├── README.md
├── generate-responsive-image-data.js
├── jsconfig.json
├── netlify.toml
├── package.json
├── src
│   ├── app.html
│   ├── content
│   │   └── blog
│   │       ├── best-medium-format-camera-for-starting-out
│   │       ├── folding-camera
│   │       └── twin-lens-reflex-camera
│   ├── global.d.ts
│   ├── hooks.server.js
│   ├── lib
│   │   ├── assets
│   │   │   ├── blog
│   │   │   └── home
│   │   ├── components
│   │   │   ├── BannerImage.svelte
│   │   │   └── ...
│   │   ├── config
│   │   │   └── website.js
│   │   ├── constants
│   │   │   └── entities.js
│   │   ├── generated
│   │   │   └── posts
│   │   ├── styles
│   │   └── utilities
│   │       ├── blog.js
│   │       ├── file.js
│   │       └── image.js
│   ├── routes
│   │   ├── +error.svelte
│   │   ├── +layout.js
│   │   ├── +layout.svelte
│   │   ├── +page.js
│   │   ├── +page.svelte
│   │   ├── [slug]
│   │   │   ├── +layout.svelte
│   │   │   ├── +page.js
│   │   │   └── +page.svelte
│   │   ├── contact
│   │   │   └── +page.svelte
│   │   ├── manifest.webmanifest
│   │   │   └── +server.js
│   │   └── sitemap.xml
│   │       └── +server.js
│   └── service-worker.js
├── static
│   ├── assets
│   ├── favicon.png
│   ├── icon.svg
│   ├── robots.txt
│   └── sitemap.xml
└── svelte.config.js
- The
src/content/blogis where we need to put our blog posts. Just clean out the sample content and replace it with your views on the world! There is a separate folder for each post, which allows you to keep images, video and other related media specific to a post better organised. We set the browser path from this folder name, so keep that in mind when naming the folders. Write the actual post in a file calledindex.mdwithin post's folder. Although the file has an.mdextension, you can write Svelte in it.
hooks.server.jswe define Content Security Policy (CSP) and other HTTP security headers in here, effective for server side rendered apps. See post on SvelteKit static site HTTP headers to see how to set up CSP etc. for static sites.
src/lib/componentsthese are the components we use in pages.
-
src/lib/config/website.jsfor convenience we define properties for the site here such as the site title, contact email addresses and social media accounts. Some properties feed from environment variables. See a post on getting started with SvelteKit for more on environment variables in SvelteKit. -
src/lib/stylesdoes what you expect! We use SCSS for styling and source self-hosted fonts in the layouts.
src/utilities/blog.jsthis file contains some code for helping us transform the markdown in blog posts to Svelte. As well as that they help extract fields in the frontmatter (this is the metadata we include at the top of the blog postindex.mdfiles).
-
src/routes/[slug]/+page.jsthis is essentially a template for blog post data. One of these files is generated at build for each blog post. It is used to extract data needed in the Svelte file used to generate the post's HTML. -
src/routes/[slug]/+page.sveltesimilarly to the previous file, one of these is generated for each blog post. This time it is the Svelte code which SvelteKit uses to generate the HTML and JavaScript for our blog posts.
I mention most of the other files in the Getting Started with SvelteKit blog post, but let me know if I have missed anything which needs more explanation.
Feel free to jump into the Rodney Lab matrix chat room.

