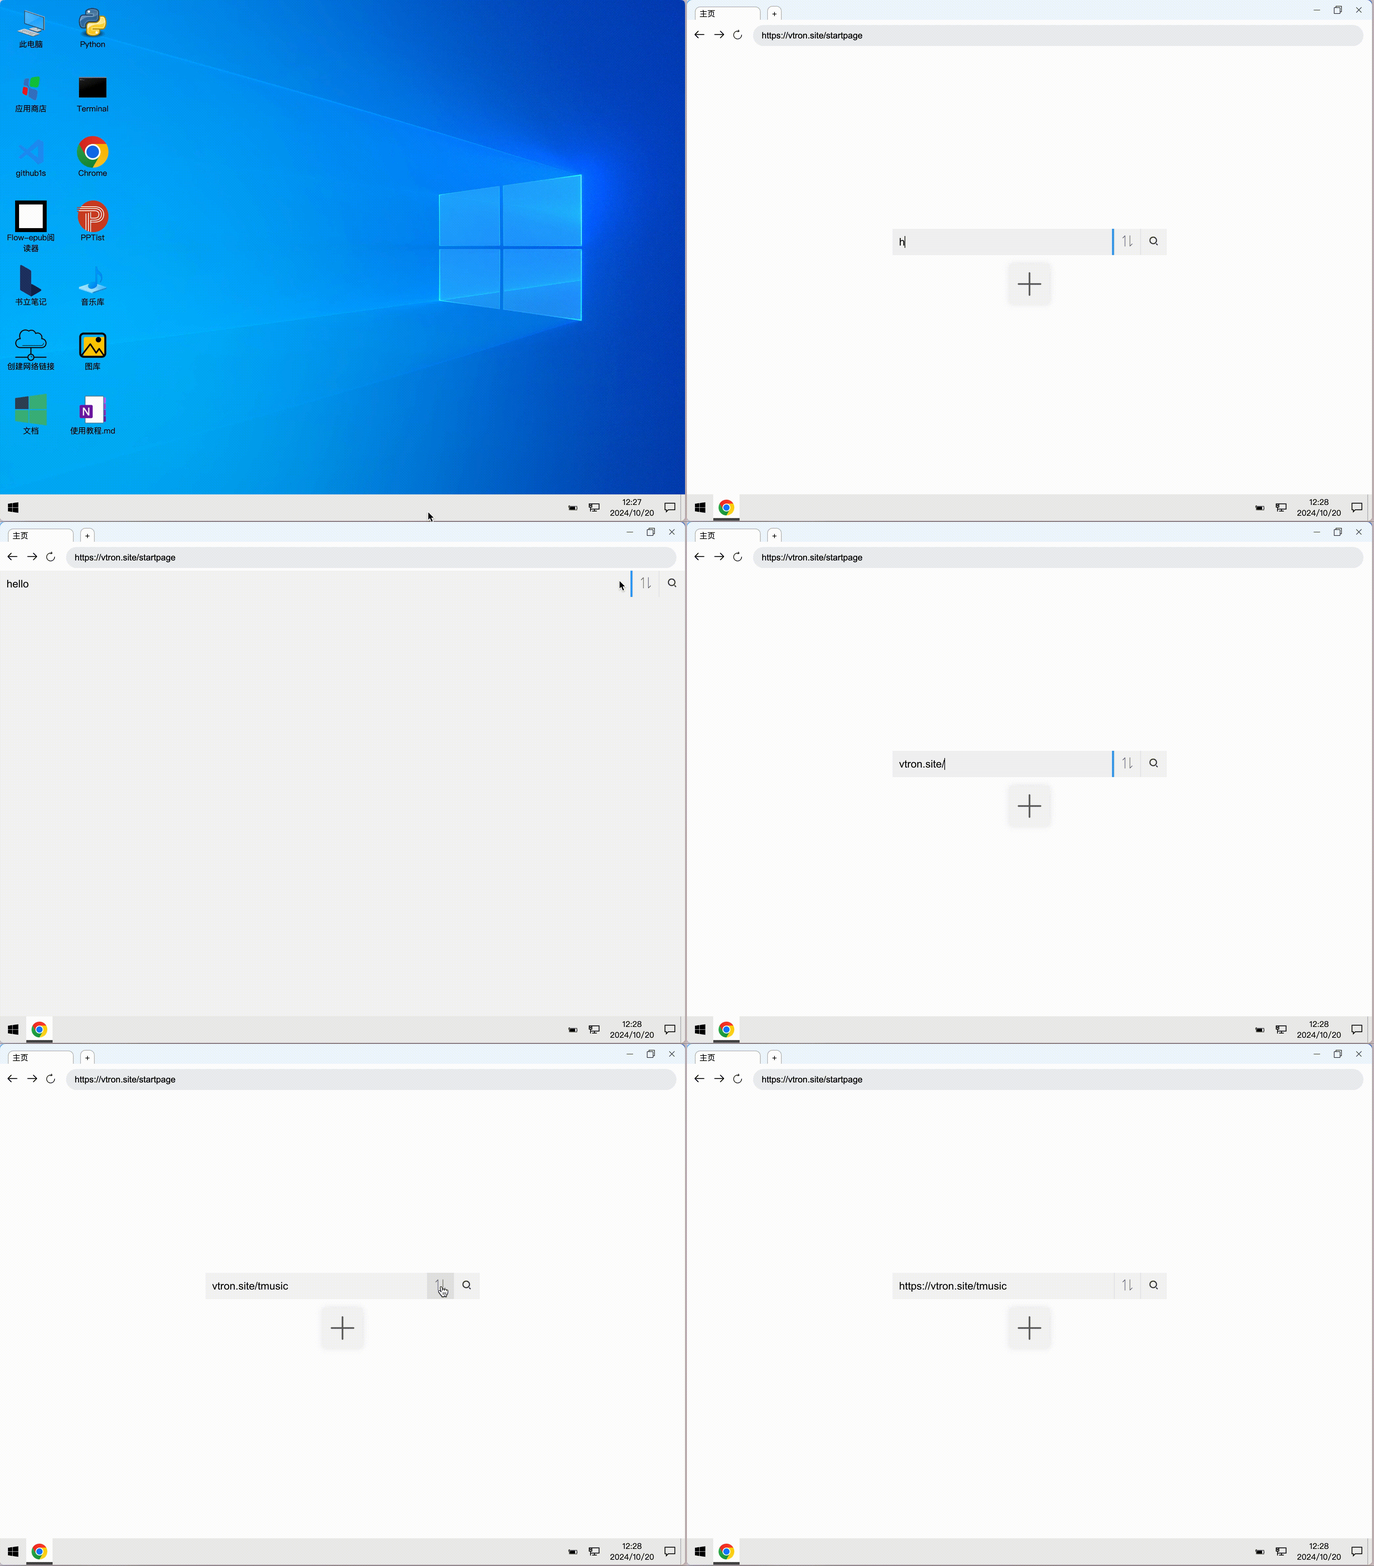
vtron, 基于Vue3的 Win10 UI 框架
推荐 Vue 3 + Typescript + Vite
English | 中文
本框架可以让你的页面像win10视窗系统一样,运行一个网页上的win10系统。
文件系统:可以上传文件预览显示编辑。长时间保存。
终端系统:终端控制文件。
js执行:保存的js文件可以执行。
软件商店:下载的软件可以长时间保存。
开发时插件机制,控制system的状态。
qq群:712921211
更新demo项目的主页,浏览器,以及添加flac音乐播放器
从这个模版仓库创建新的项目。
- clone 项目
git clone 已经创建好的项目
- 修改 apps 目录下的文件,或者新建 app
- 安装 vtron
npm install vtron
- 在 vue 中 引入样式文件
引入样式文件"vtron/distlib/style.css"
import 'vtron/distlib/style.css';main.ts 结果
import { createApp } from 'vue';
import App from './App.vue';
import 'vtron/distlib/style.css';

createApp(App).mount('#app');
注意
- 在页面中引入
VtronComputer组件和创建System实例
我们需要创建一个 System 实例,这个实例管理着系统的所有状态信息。
并且需要在vue组件模版中写入VtronComputer组件
将new出来的System实例传入到VtronComputer组件的system参数中
// App.vue
<template>
  <div class="outer">
    <VtronComputer :system="system"></VtronComputer>
  </div>
</template>
<script setup>
import { System,VtronComputer} from 'vtron';
let system = new System();
</script>
此步骤之后,run dev 已经可以看到 win10 启动了
- 控制屏幕 🖥 大小
在组件外围包裹一个 outer
<template>
  <div class="outer">
    <VtronComputer :system="system"></VtronComputer>
  </div>
</template>
定义 outer 样式
<style scoped>
  .outer {
    width: 100vw;
    height: 100vh;
  }
</style>
这样就是占据全部页面显示
- 在 apps 文件夹下新建 vue 文件,主要在此文件夹中编写窗口内容
也可以在其他文件夹下,
这次,我们创建一个Hello.vue文件,
// Hello.vue
<template>
  <div class="app">
    <h1>HelloWorld</h1>
  </div>
</template>- 在 system 中注册 app
在 system 的构造函数传入配置项,
其中 desktop 是桌面的配置项,可以配置多个 app
配置之后,软件的图标,快捷方式会显示在桌面上
注意!
需要点击开始菜单中的电源按钮,再点击恢复,才能看到 app
注册之后,需要点击开始菜单中的电源按钮,再点击恢复,才能看到 app
这样是为了使得系统重回第一次启动的状态,这样 vtron 才会在桌面重新添加图标
<script setup>
import { System } from 'vtron';
import HelloVue from './apps/Hello.vue';
import someicon from './assets/someicon.png';
let system = new System({
  desktop: [
    {
      name: 'HelloVue',
      icon: someicon,
      window: {
        content: HelloVue,
        icon: someicon,
      },
    },
  ],
});
</script>下面是包含了部分api操作的示例
<template>
  <div class="outer">
    {{ sys?.version }}
  </div>
</template>
<script lang="ts" setup>
import { Notify, BrowserWindow, System } from 'vtron';
import { inject, onMounted, ref, onUnmounted } from 'vue';
// 通过inject获取到窗口所在的系统的信息
const system = inject<System>('system')!;
/**
 * 有两种在窗口中使用system的方法,一种是通过inject注入,一种是直接引入system的实例
 * const system = new System();
 * export {
 *  system
 * }
 *
 * 这样就可以在窗口中直接使用system的实例
 * import { system } from './system';
 *
 */

// 通过inject导入本窗口的信息
const browserWindow: BrowserWindow = inject('browserWindow') as BrowserWindow;

// 获取本地保存的md文件
system.fs.readFile('/C/User/Note/test.md').then((res) => {
  console.log(res);
});

// 监听窗口的部分事件
browserWindow.on('move', (...arg: any) => {
  console.log('move', arg);
});
browserWindow.on('resize', (...arg: any) => {
  console.log('resize', arg);
});
browserWindow.on('state', (...arg: any) => {
  console.log('state', arg);
});

function nextStep(fun: () => void, time?: number) {
  return new Promise((resolve) => {
    const res = fun();
    setTimeout(() => {
      resolve(res);
    }, time || 50);
  });
}
await nextStep(() => {
  // 获取窗口的位置大小
  const [x, y] = browserWindow.getPosition();
  const [width, height] = browserWindow.getSize();
  // 调用系统提示,创建之后,会在屏幕右下角显示消息通知
  new Notify({
    title: 'title',
    content: `${x},${y},${width},${height}`,
    timeout: 5000,
  });
}, 100);
await nextStep(() => {
  // 设置窗口的位置大小
  browserWindow.setPosition(100, 100);
  browserWindow.setSize(500, 500);
}, 100);

await nextStep(() => {
  // 将窗口居中
  browserWindow.center();
}, 100);

await nextStep(() => {
  const title = browserWindow.getTitle();
  // 设置窗口的标题
  browserWindow.setTitle('新标题');
}, 100);
await nextStep(() => {
  // 窗口最大化
  browserWindow.maximize();
}, 200);
await nextStep(() => {
  // 恢复窗口状态
  browserWindow.restore();
}, 100);
await nextStep(() => {
  // 窗口最小化
  browserWindow.minimize();
}, 200);
await nextStep(() => {
  // 恢复窗口状态
  browserWindow.restore();
}, 100);

await nextStep(() => {
  // 设置窗口全屏
  browserWindow.setFullScreen(true);
}, 100);
await nextStep(() => {
  browserWindow.setFullScreen(false);
}, 100);

</script>在一个应用中,可以使用BrowserWindow类创建一个窗口
<template>
  <div class="outer">
    <button @click="createWindow">创建窗口</button>
  </div>
</template>
<script lang="ts" setup>
import { BrowserWindow } from 'vtron';
import { ref } from 'vue';
const createWindow = () => {
  const win = new BrowserWindow();
  win.show();
};
</script>通过实例化BrowserWindow类,可以创建一个窗口,然后通过show方法显示出来
还有另一种方法,通过system的createWindow方法创建窗口
<template>
  <div class="outer">
    <button @click="createWindow">创建窗口</button>
  </div>
</template>
<script lang="ts" setup>
import { system } from './system';
import { ref } from 'vue';
const createWindow = () => {
  const win = system.createWindow({
    content: ///....,
    title: 'Hello',
  });
  win.show();
};
</script>这两种方法有细微的区别,system.createWindow创建的窗口,是在当前系统中创建的窗口,
而BrowserWindow创建的窗口是没有指定system的,之所以会在当前system显示出来窗口,是因为BrowserWindow类默认是当前的system。
可以通过BrowserWindow.system 查看到当前BrowserWindow的默认system,一般是最后创建的system实例。
当我们创建多个system的时候,就必须使用system.createWindow来创建窗口了。
为什么在 system 中添加了 app,桌面还是没有显示出 app
桌面的图标都是在用户的文件系统中保存的
Vtron 只有在系统第一次启动的时候,才会在文件系统中添加 app 图标
所以,这时需要点击开始菜单->电源->恢复
恢复之后,系统会回到第一次启动的状态,这时,会执行一些特殊的过程,比如在桌面添加 app 图标
欢迎任何更改,pr
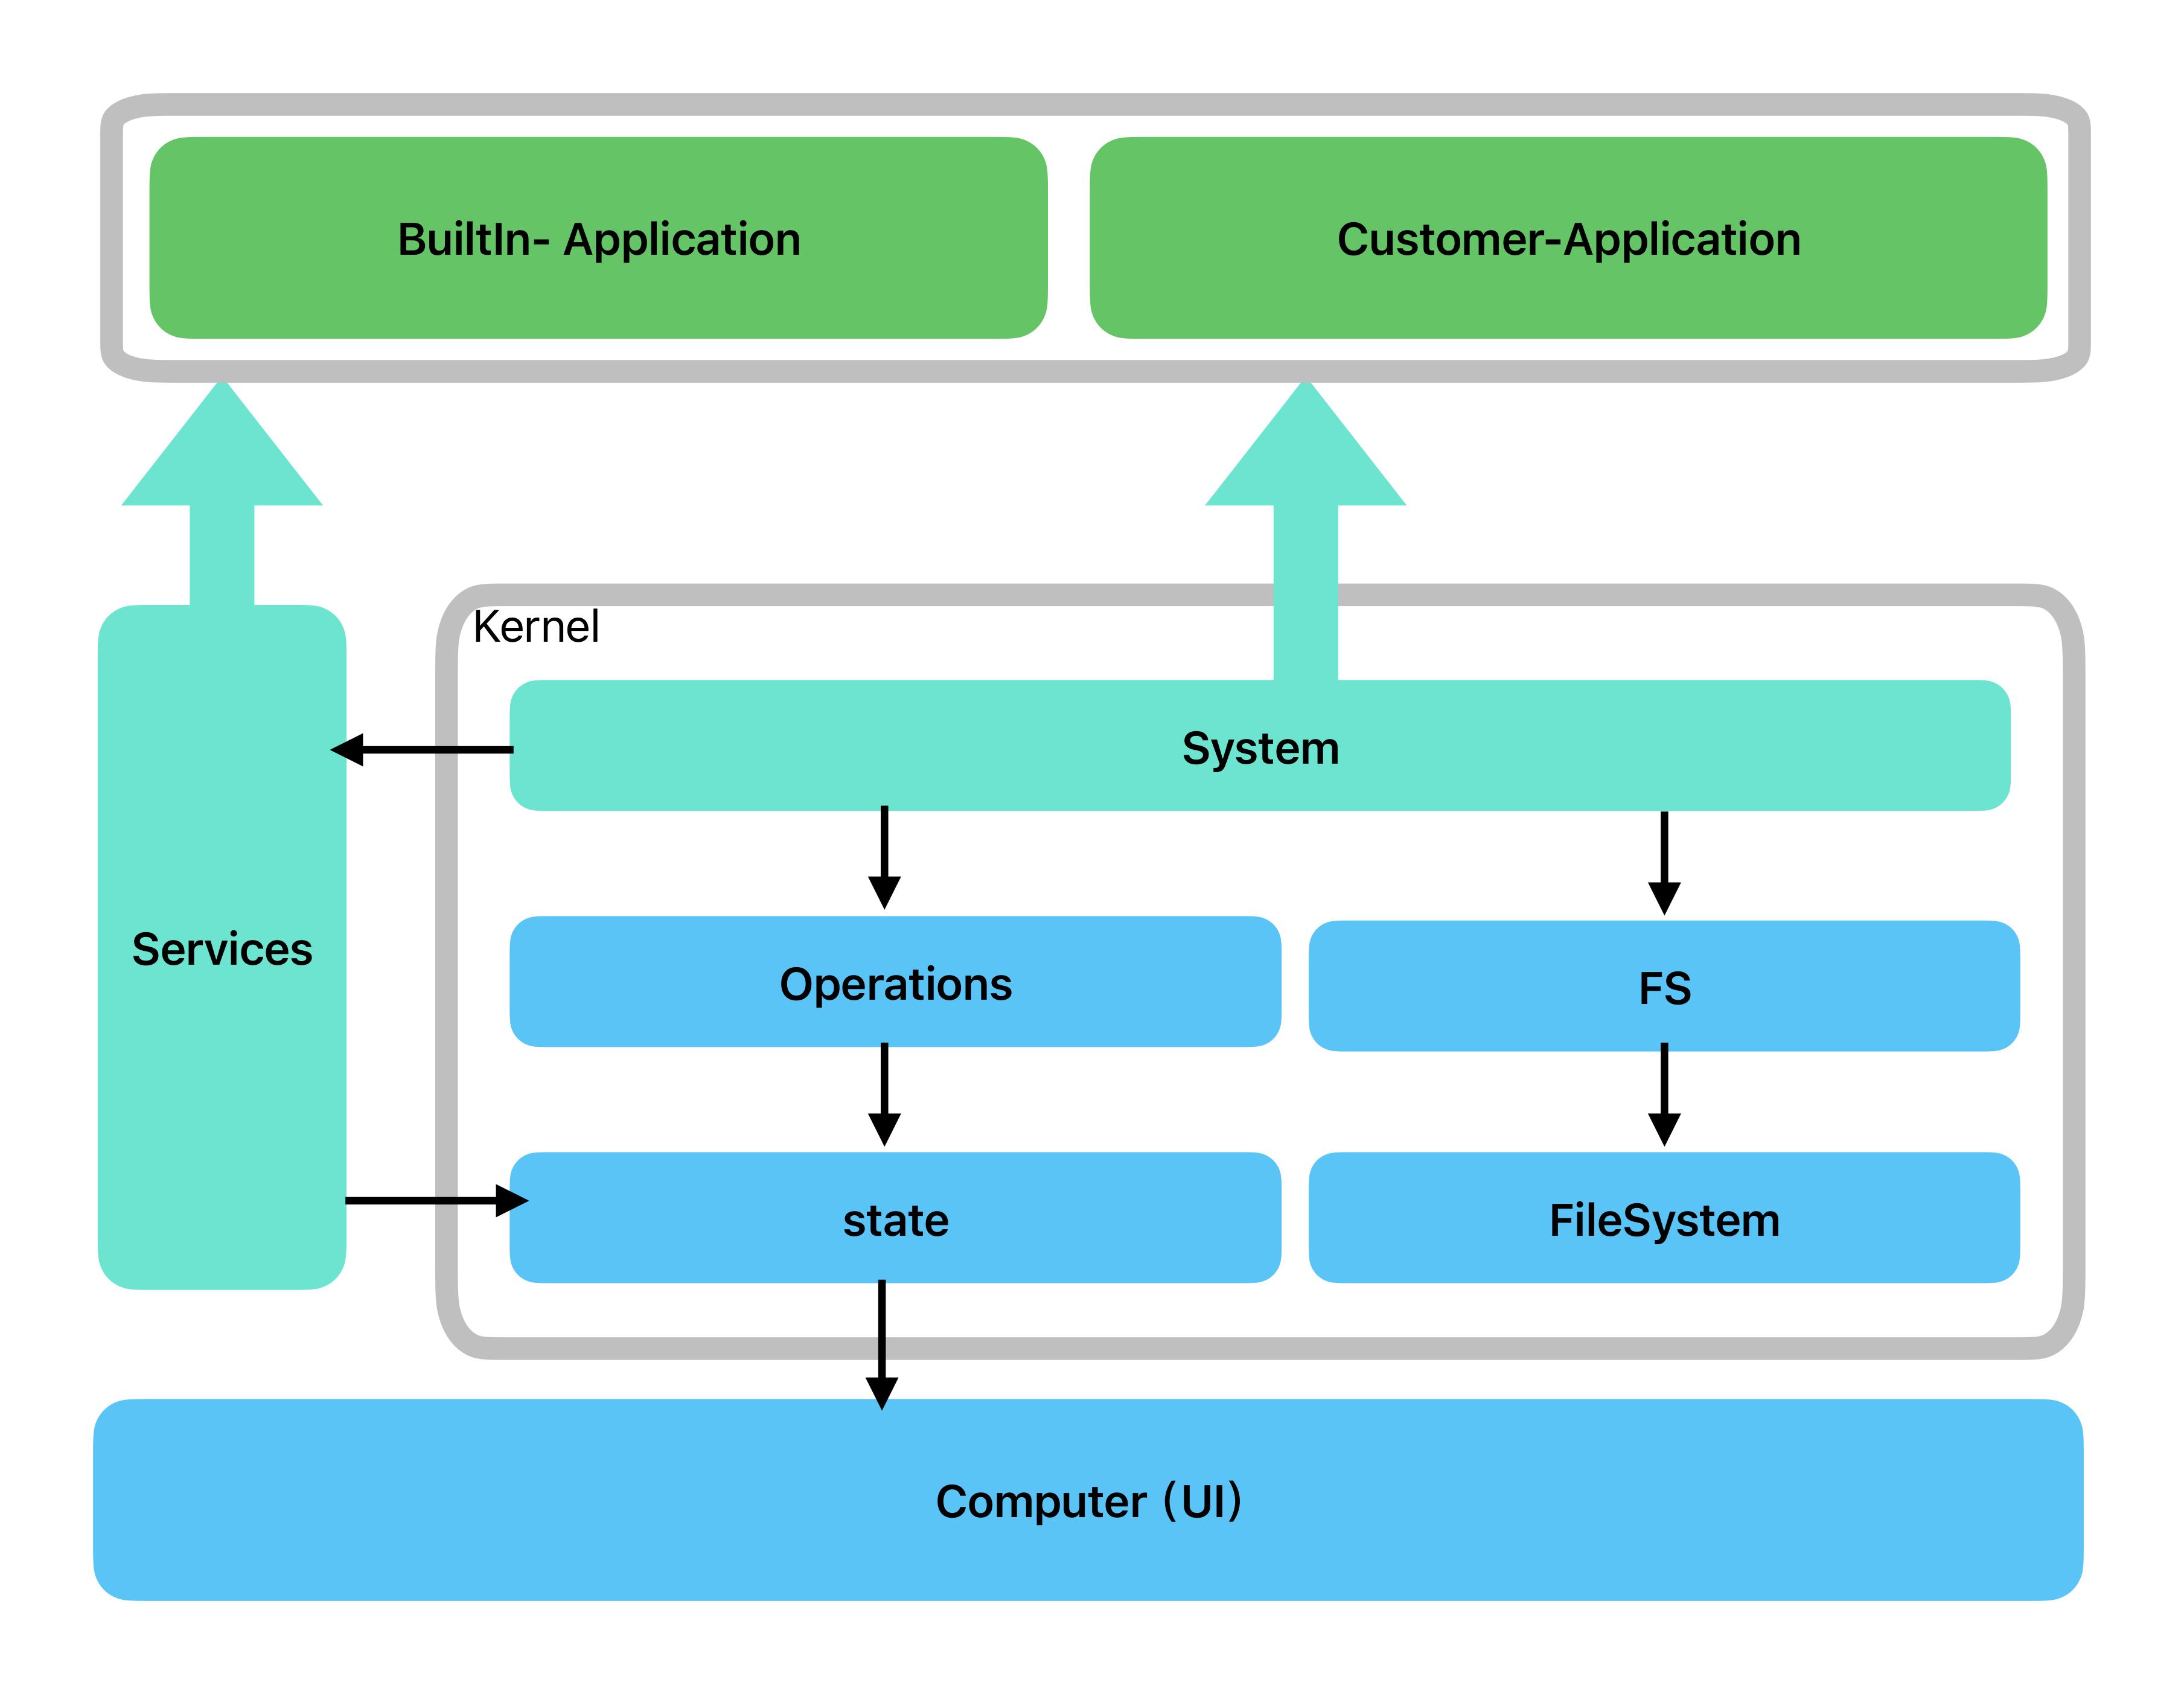
系统架构:
项目是monorepo项目,
包含多个子项目,存在于packages下,每个文件夹是一个子项目。
vtron: 核心项目,包含核心逻辑,vtron核心包。
vtron-demo: demo项目,也是线上vtron.site/win的项目。
vtron-e2e: e2e测试监控项目。
vtron-md: 文档项目,指线上vtron.site/doc/
vtron-plus: plus插件,包含了部分占用体积的附加功能。
vtron-store: 应用商店,线上应用商店打开时的内嵌网页,可以与vtron框架交互,提供应用安装功能。
首先安装所有依赖,建议使用pnpm。
pnpm i安装依赖之后,启动对应子项目,
对于vtron 项目,运行:
pnpm vtron dev对于plus项目,运行:
pnpm vtron build
pnpm plus dev
对于demo项目,运行:
pnpm vtron build
pnpm plus build
pnpm demo dev
对于md项目,运行:
pnpm md dev对于shop项目,运行:
pnpm shop dev对于e2e项目,运行:
pnpm e2e dev欢迎PR,意见,想法,感谢各位大佬的支持
我们需要帮助:
目前需要帮助的方向:
文档建设
更加完善的功能:向更加完善的webOS迈进
碎碎念:参见 Next.md
技术交流 & 问题解答 & 项目合作 & 软件服务


