This is a simple stream processing example project, written in Scala and using Google Cloud Platform's services/APIs:
- Cloud Dataflow for data processing
- Cloud Pub/Sub for messaging
- Cloud Bigtable for storage
This was built by the Engineering team at Snowplow Analytics, as part of their exploratory work for porting Snowplow to GCP.
Running this requires a Google account and enabling GCP services, which will incur certain costs
We assume that you have pyinvoke installed, as well as the Google Cloud Python SDK, in order for the helper script to work.
We have implemented a super simple analytics-on-write stream processing job using Google Cloud Dataflow and the Apache Beam APIs. Our Dataflow job reads a Cloud Pub/Sub topic containing events in a JSON format:
{
  "timestamp": "2015-06-05T12:54:43.064528",
  "type": "Green",
  "id": "4ec80fb1-0963-4e35-8f54-ce760499d974"
}
Our job counts the events by type and aggregates these counts into 1-minute buckets. The job then takes these aggregates and saves them into a table in Cloud Bigtable.
Assuming git, Vagrant and VirtualBox installed:
 host$ git clone https://github.com/snowplow/google-cloud-dataflow-example-project.git
 host$ cd google-cloud-dataflow-example-project
 host$ vagrant up && vagrant ssh
guest$ cd /vagrant
guest$ sbt assemblyFirst we need to create and setup a GCP project. To do so, you can follow this guide on Snowplow's wiki. Following those instructions, you'll need to enable the following APIs/services:
- Cloud Dataflow
- Cloud Bigtable
- Cloud Pub/Sub
- Cloud Storage
After that, you'll need to authenticate the computer where you'll be running the project using the Google Cloud SDK. To do so, run the following commands:
$ gcloud auth login
$ gcloud auth application-default login
$ gcloud config set project ${your_project_id}
Note: Some of the following tasks can be performed using the helper script provided in this repo. The script uses pyinvoke - each action provided by the script is preceded by 'inv'. Run $ inv --list on the repo root to list the available actions on the script. At some important steps the script assumes default configurations, which might not be the right ones for you. For example, when creating a Bigtable instance and table, the script will choose SSD storage over HDD, which is significantly more expensive.
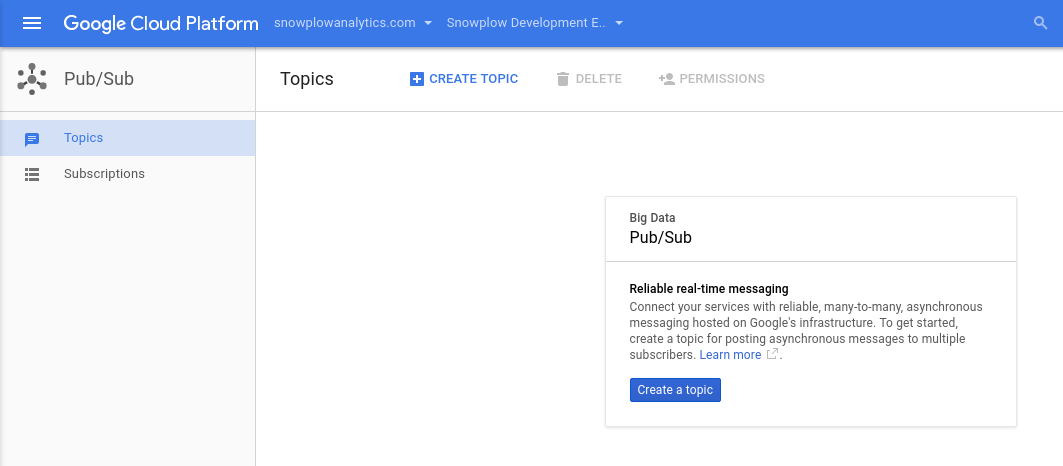
After enabling Pub/Sub, go to https://console.cloud.google.com/cloudpubsub?project=${your_project_id} - change ${your_project_id} to the project ID you set above.
There, click "Create Topic" and type in whatever name you want to give to the topic we'll be using to read the events from:
In our example, we used "test-topic". Write down your topic's name (you can always go to that URL to check it), as you'll need it when you're creating your config file.
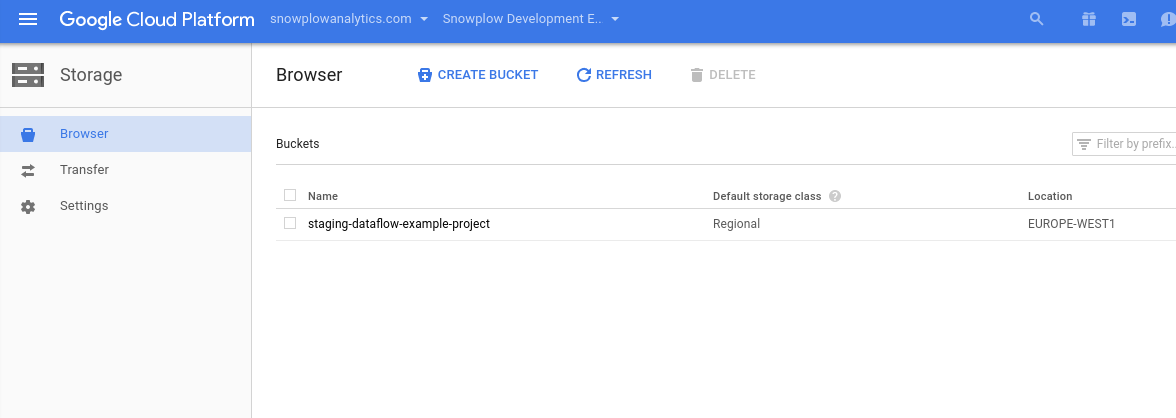
Create a staging location in Cloud Storage, for the system to store the jars to be run by the Cloud Dataflow workers. To do this, you need to enable the Storage API.
After that, go to https://console.cloud.google.com/storage/browser?project=${your_project_id} and click "Create Bucket". Fill in the appropriate details. As this is an example project, we suggest you pick the cheapest option:
After creating your bucket, you might want to create a folder inside it, to serve as your staging location; you can also just use the bucket's root. To create a folder in your bucket, after you created the bucket, select it in the list and then click "Create Folder".
Your staging location will be:
gs://your-bucket-name/your-folderAfter enabling Bigtable, we'll need to create an instance where our table will be stored. And then create the actual table.
To create a Bigtable instance and table, you could connect to the HBase shell which lives inside Google Cloud Shell, [per these docs] (https://cloud.google.com/bigtable/docs/quickstart-hbase). However, to simplify the process we provide a way to do it with the helper script, by simply running:
$ inv create_bigtable_table --column-family=cf1 --instance-id=test-instance --region=us-west1-a --table-name=test-table
We're using "test-table" as the table name, "test-instance" as the instance name and "cf1" as the column family. Bigtable is a clustered NoSQL database - each database is identified by its instance-id. It has the concept of column families: groups of columns that are related and likely to be accessed at approximately the same time. In the context of this project, all the columns will live in the same column family.
At this step, you've already created a Cloud Pub/Sub topic, either via the web interface or the helper script we provide in this repo. In our case, the topic is called "test-topic".
To start the event generator, simply run the following command, on the repo's root:
$ inv generate_events --topic-name=test-topic --nr-events=5If you don't specify the number of events to send with --nr-events, then by default infinite events will be sent.
To run our job on Cloud Dataflow, you will need a "fat jar" - a JVM-compatible file which contains all of the dependencies required for the job to run.
We host the fat jar for you on Bintray at this link).
Alternatively, if you prefer you can build it yourself by running $ sbt assembly, on the repo root.
You can then either enter SBT's REPL and run it from there, doing:
sbt-repl> run --config /path/to/config/file.hoconOr you can use the helper script, from the repo root:
$ inv run_project --config=/path/to/config/file.hoconThere is an example config file in config/config.hocon.sample. If you've been using the same names as we did, you'll only need to perform some minimal changes, specifically:
- Updating the project ID
- Updating the Pub/Sub topic's full name
- Updating the staging location in Cloud Storage to upload the fat jar to
There are two places we can check to see if everything is running smoothly.
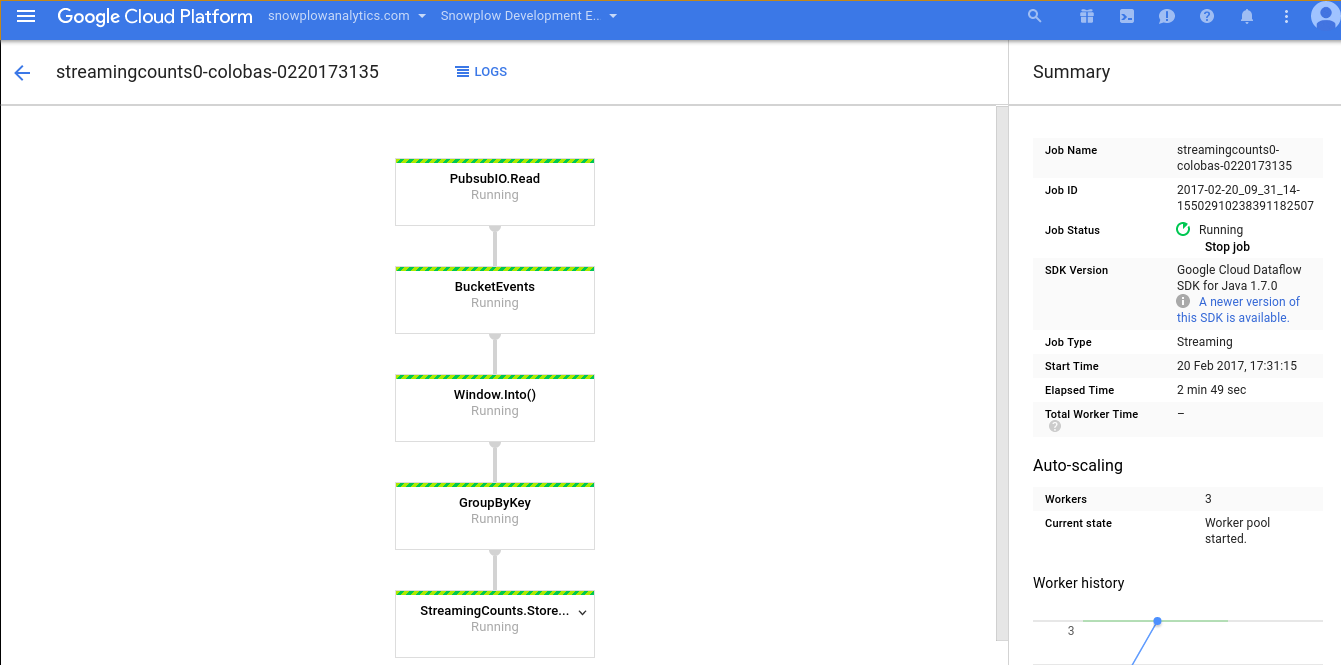
The first place is the Dataflow's web interface. Go to https://console.cloud.google.com/dataflow?project=${your_project_id} and select the job you just submitted. You should then see a graph with the several transforms that make up our data pipeline:
You can click on the transforms to get specific info about each one, such as their throughput. If something is not working properly, you'll get warnings under "Logs". You can also check the central log in: https://console.cloud.google.com/logs?project=${your_project_id}
The second place you'll want to check is your Bigtable table. To do so, this link has instructions on how to run an HBase shell inside your Google Cloud Shell - once you are connected, run this command in that shell (assuming your table is called "test-table"):
hbase-shell> scan "test-table"
This will print the several rows in the table, which correspond to the counts of a specific type of event in a specific time-bucket:
Great! Our Dataflow job is now operational: simple events arriving in Pub/Sub are being read by our Dataflow job, which is then updating simple minute-precision counts in Cloud Bigtable.
These steps will stop your job execution:
- Click "Stop Job" on Dataflow's menu, under "Job Status", on the right sidebar. Then select "Cancel"
- Kill the event generator (Ctrl+C on the corresponding terminal window)
- Within Google Cloud Shell, inside the HBase shell, run:
hbase-shell> disable "test-table"
hbase-shell> drop "test-table"
To avoid unwanted expenditure, you'll also want to shut down your resources. The easiest way to do it is to just delete the project that you've been working on above. To do so, go here, select the project and click "Delete Project".
Copyright 2017 Snowplow Analytics Ltd.
Licensed under the Apache License, Version 2.0 (the "License"); you may not use this software except in compliance with the License.
Unless required by applicable law or agreed to in writing, software distributed under the License is distributed on an "AS IS" BASIS, WITHOUT WARRANTIES OR CONDITIONS OF ANY KIND, either express or implied. See the License for the specific language governing permissions and limitations under the License.


